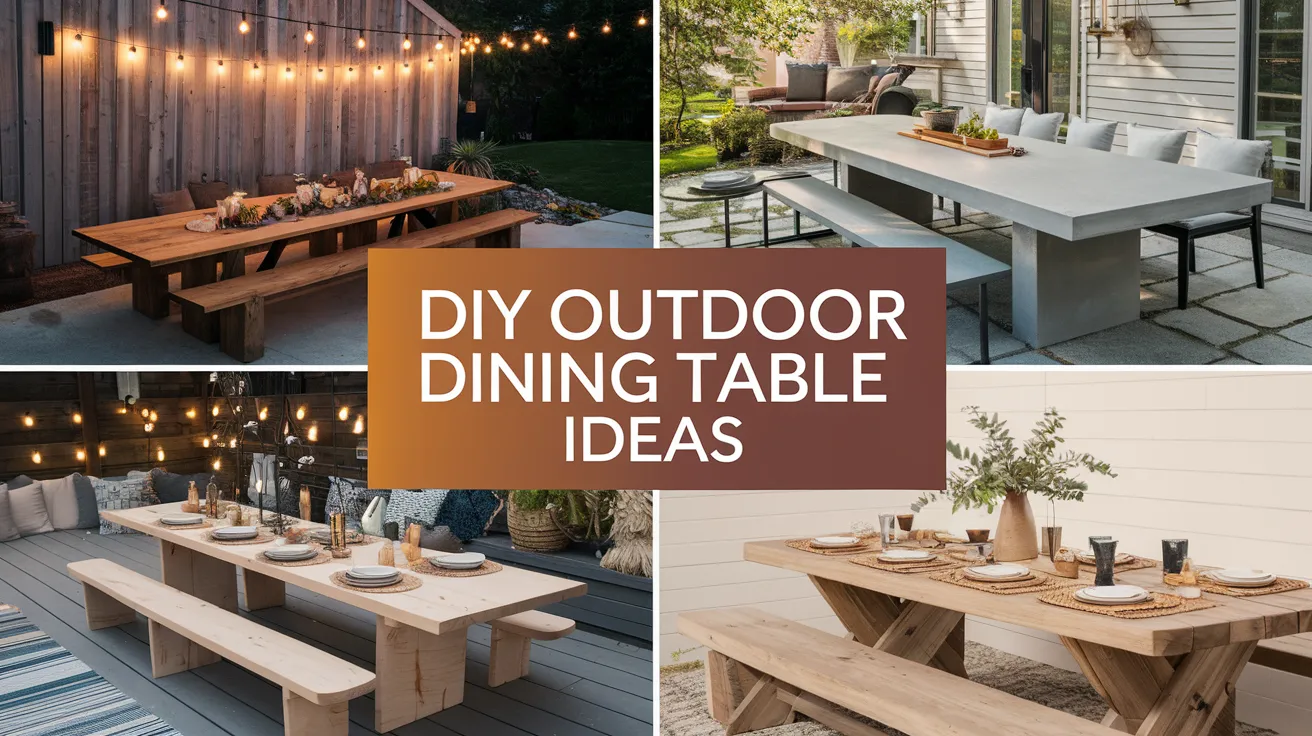
20 DIY Outdoor Dining Table Ideas You’ll Want to Build This Weekend
You want a sturdy, good-looking outdoor dining table that doesn’t drain your wallet, right? Same. I build outside furniture because I love big meals, bigger laughs, and the kind of patios that make neighbors “casually” walk by twice. I learned a few tricks, burned a few boards, and ate a lot of pizza on half-finished tables—so you can skip the chaos and go straight to the fun.
You’ll find 20 DIY outdoor dining table ideas here that cover every vibe—modern, rustic, compact, extendable, and “I built this in an afternoon because guests come at six.” I’ll show you how to pick materials, plan cuts, and finish surfaces that survive sun, rain, and rowdy family card games. You want honest takes, practical steps, and a friendly nudge? You’re in the right backyard, friend.
I keep the tone real and the moves simple. I share why each design works, where you can save, and where you should never skimp. I also drop image prompts for AI tools, so you can visualize each build before you buy a single board. Ready to turn that patio into your favorite room?
1) 2×4 Weekend Warrior Table
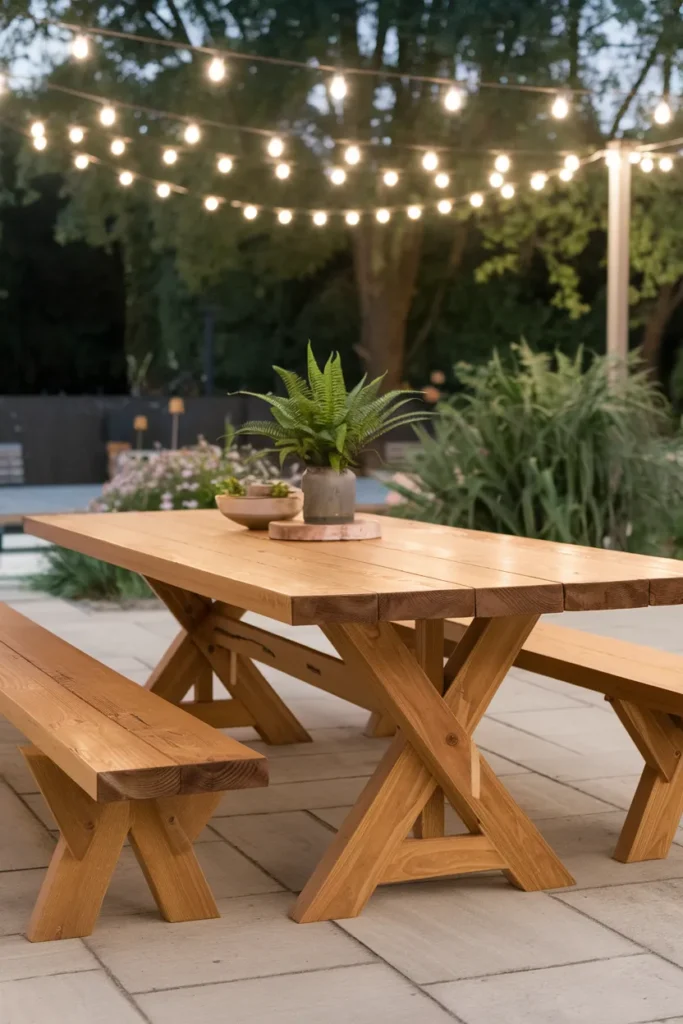
You want fast, cheap, and solid? This 2×4 dining table crushes it for beginners and looks clean enough for seasoned builders.
Why it works
You find 2×4 lumber everywhere. The chunky profile screams “hearty backyard table,” and the design stays stable even when your cousin leans on it.
Materials & specs
- Lumber: Kiln-dried 2×4s (frame and top), 2×6s optional for a beefier top
- Hardware: Exterior screws, pocket hole screws
- Finish: Exterior stain + spar urethane or water-based exterior poly
- Seats: 6–8
- Skill: Beginner
- Budget: Low
Build notes
- Rip 2×4 edges to remove factory round-over if you want a cleaner look.
- Glue and screw tabletop boards with ⅛” spacers for drainage.
- Add two stretcher rails for anti-wobble confidence.
Pro tip
Seal the end grain twice. Moisture sneaks in there first.
2) Modern A-Frame Patio Table
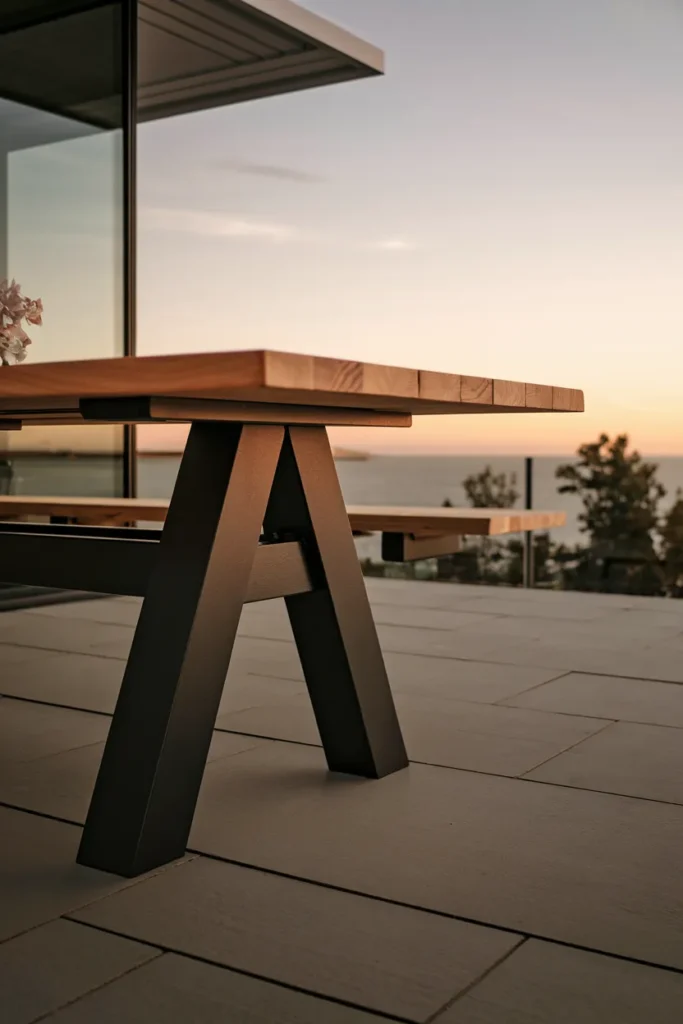
This A-frame base brings a modern, architectural vibe that stands out without trying too hard.
Why it works
The angled legs increase stability and deliver a crisp silhouette. Your chairs tuck in neatly.
Materials & specs
- Lumber: 2×6 or 4×4 for legs, 2×4 for aprons
- Joinery: Half-lap or bolt-through with hardware plates
- Finish: Black or charcoal exterior paint on base, natural sealed top
- Seats: 6–8
- Skill: Intermediate
Build notes
- Cut matching angles for both legs.
- Anchor the apex with a bolted cross-brace.
- Use leveling feet if your patio has a slope.
3) Farmhouse Plank Table with Breadboard Ends
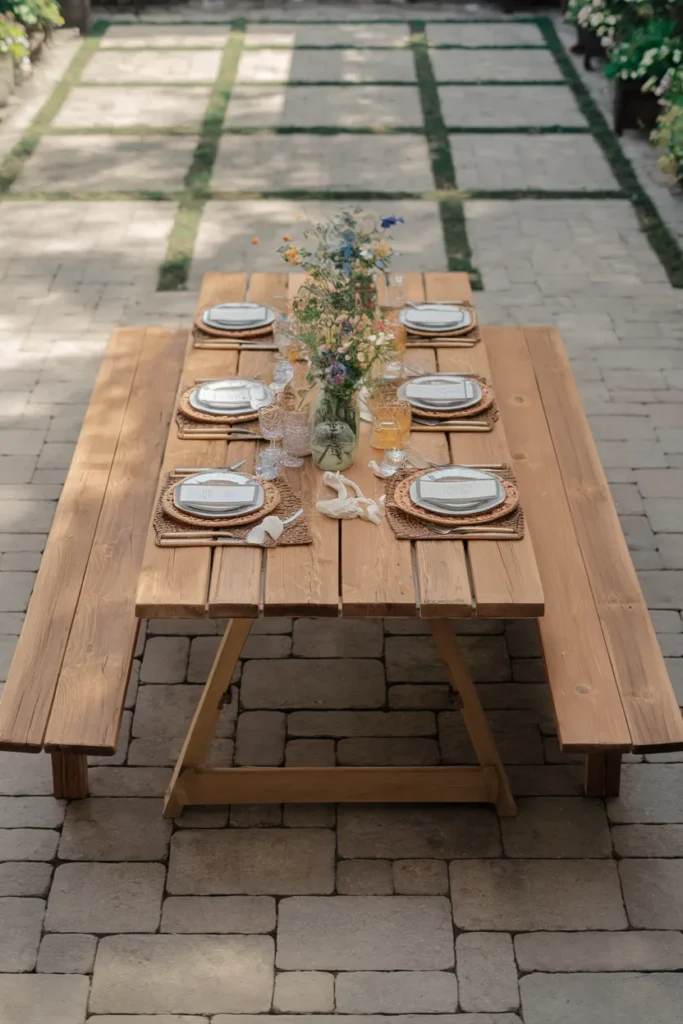
You love that timeless farmhouse look? Breadboard ends deliver the detail.
Why it works
Breadboard ends keep wide planks flat and look fancy without complex joinery. The style handles big family dinners like a champ.
Materials & specs
- Lumber: 2×8 or 2×10 planks, 2×4 frame
- Joinery: Pocket screws + elongated holes at the ends for wood movement
- Finish: Semi-opaque stain for farmhouse warmth
- Seats: 8–10
- Skill: Intermediate
Build notes
- Leave expansion slots on breadboard ends.
- Add a solid center stretcher for long spans.
- Round edges lightly to reduce dings.
4) Coastal Slat-Top Table
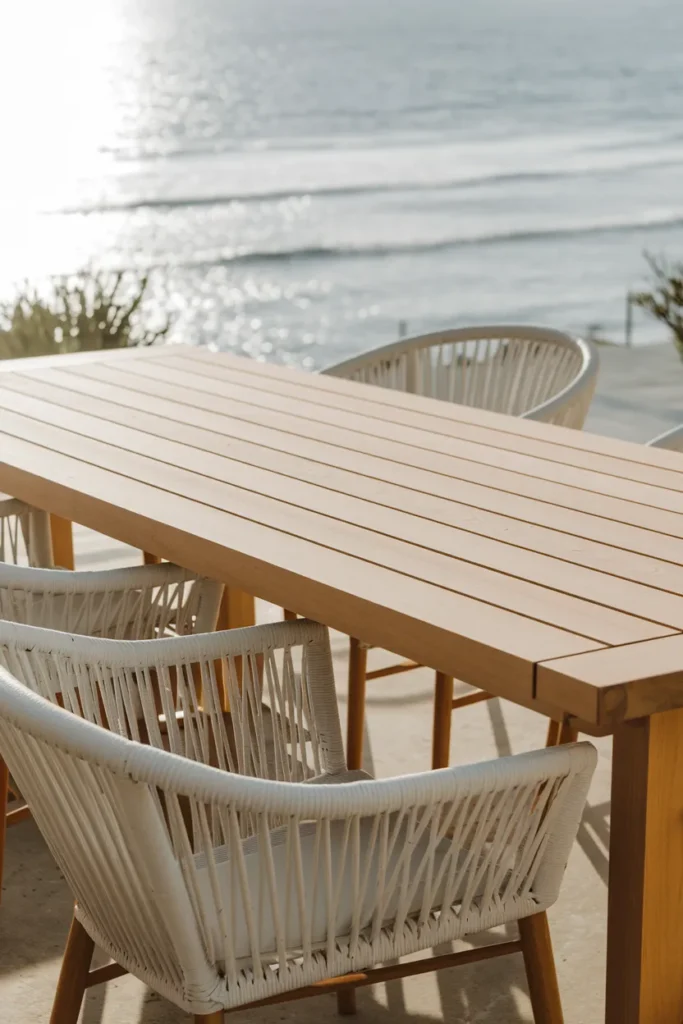
You want breeze-through slats that dry fast after rain? Go slatted.
Why it works
Slats reduce weight, improve drainage, and give a breezy coastal feel.
Materials & specs
- Lumber: Cedar or cypress
- Spacing: ⅛”–3⁄16″ between slats
- Finish: Clear UV-blocking oil
- Seats: 6–8
- Skill: Beginner–Intermediate
Build notes
- Use spacers for uniform gaps.
- Pre-finish slats before assembly for easier coverage.
- Add hidden cleats under the top for strength.
5) Herringbone Deck-Board Table
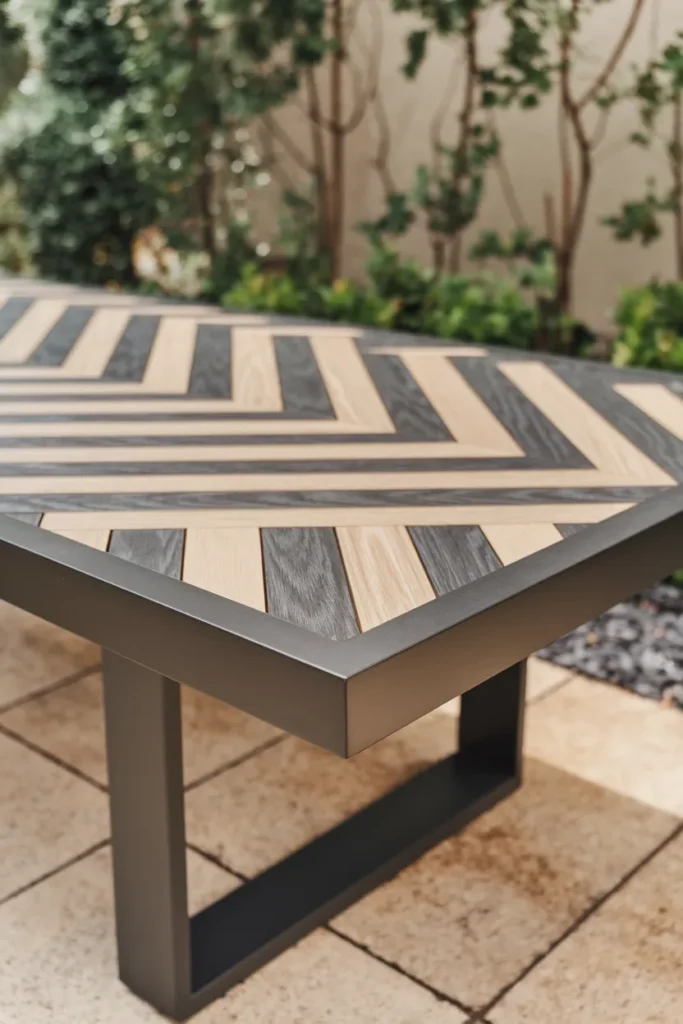
You want pattern without fussy joinery? Herringbone deck boards nail it.
Why it works
Composite or wood deck boards handle weather and create a visual “whoa” moment.
Materials & specs
- Surface: Composite deck boards or pressure-treated 1×6
- Frame: 2×4 pressure-treated
- Edge: Mitered picture frame border
- Skill: Intermediate
- Budget: Medium
Build notes
- Snap a centerline for layout.
- Cut at consistent 45° angles.
- Ventilate underneath to prevent moisture traps.
6) Reclaimed Pallet Feast Table
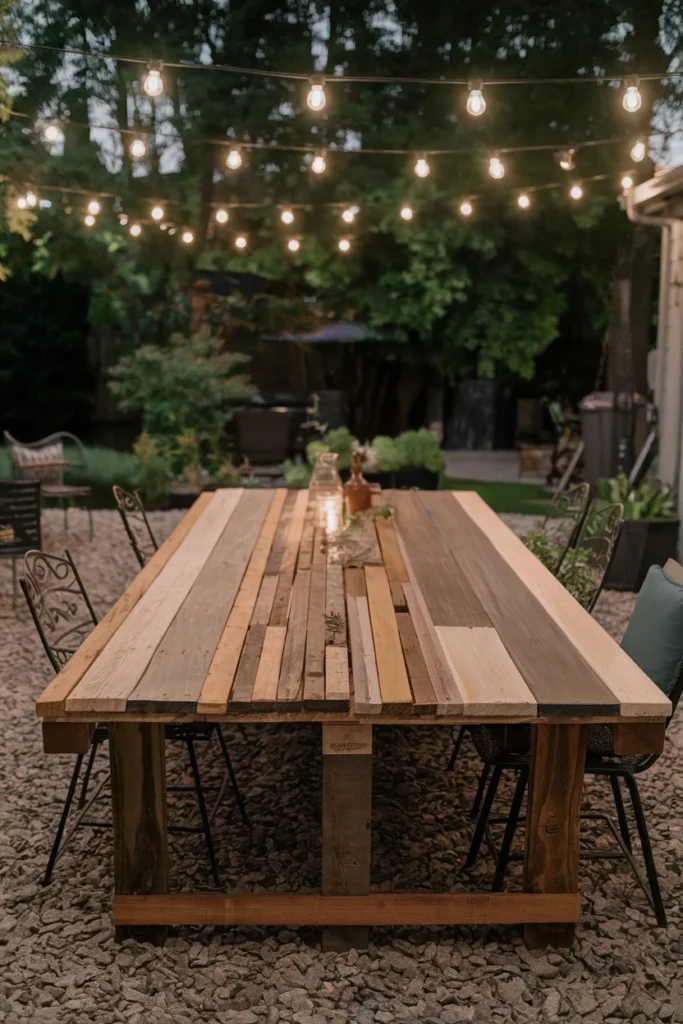
You love upcycling? Pallet wood brings character for days.
Why it works
Reclaimed boards add texture and patina. You turn scrap into a centerpiece—responsible and cool.
Materials & specs
- Lumber: Heat-treated pallets (marked HT), 2×4 frame
- Prep: Plane or sand to remove splinters
- Finish: Outdoor oil or hardwax oil
- Skill: Intermediate (because of prep)
Build notes
- Avoid chemically treated pallets (MB stamp).
- Mix board widths for a casual feel.
- Add a clear epoxy flood coat if you want a smooth, easy-clean top.
7) Space-Saver Fold-Down Wall Table
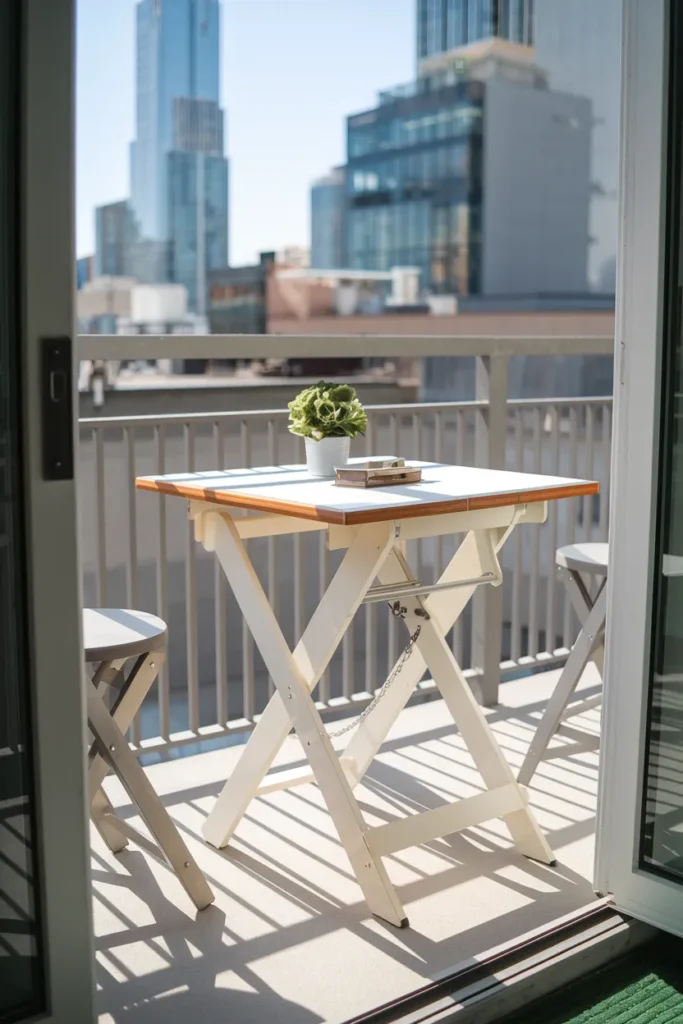
Tiny patio? Build a fold-down marvel that flips up only when you need it.
Why it works
You reclaim space while keeping real dining capacity. Wall cleats and piano hinges carry the load.
Materials & specs
- Top: ¾” exterior plywood with hardwood edge banding
- Hardware: Heavy-duty folding brackets or piano hinge + chains
- Finish: Exterior paint or marine varnish
- Seats: 2–4
- Skill: Intermediate
Build notes
- Anchor cleats into studs or masonry anchors.
- Add a shallow shelf behind the closed top for plates.
- Install a hidden magnet latch to keep it snug.
8) Round Pedestal Patio Table
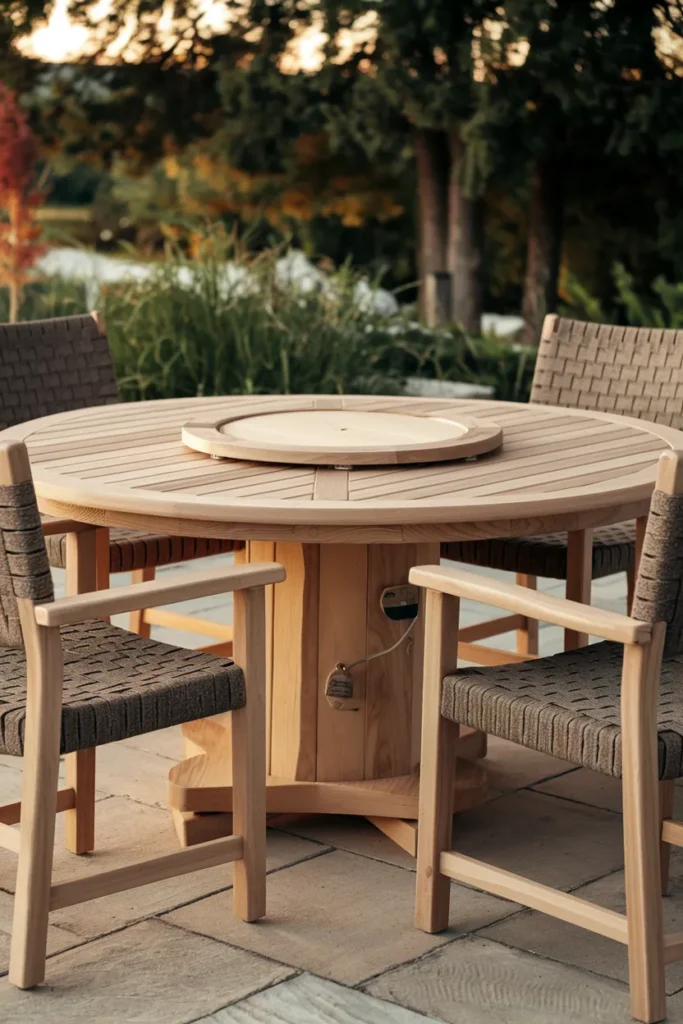
You want easy chair flow? Round tables keep the conversation tight and the knees safe.
Why it works
A central pedestal frees legroom and looks classy. You seat four or six easily.
Materials & specs
- Top: 48–54″ diameter, laminated cedar planks
- Base: 4×4 pedestal with four splayed feet
- Joinery: Lag screws + blocking
- Skill: Intermediate
Build notes
- Cut the circle with a router trammel or jigsaw + sanding disk.
- Splay feet at 12–15° for stability.
- Add a lazy Susan center if you feel spicy.
9) Concrete-Top, Wood-Base Table
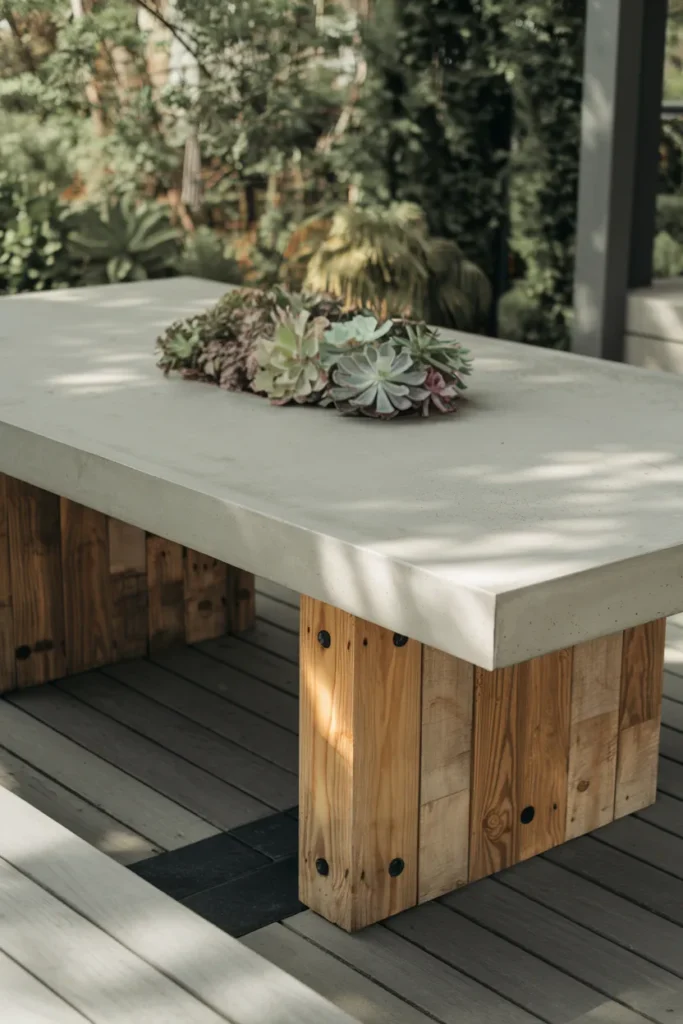
You love industrial? A concrete top delivers restaurant weight and weather resistance.
Why it works
Concrete shrugs off heat and rain, and it brings serious presence to the patio.
Materials & specs
- Top: 1.25–1.5″ GFRC or standard concrete cast in a melamine form
- Base: 4×4 legs, 2×4 aprons
- Finish: Penetrating sealer (food-safe)
- Skill: Intermediate–Advanced
Build notes
- Use reinforcement mesh or AR glass fibers.
- Vibrate the form to release air bubbles.
- Round over the top edges in the mold.
10) Tile-Inlay Dining Table
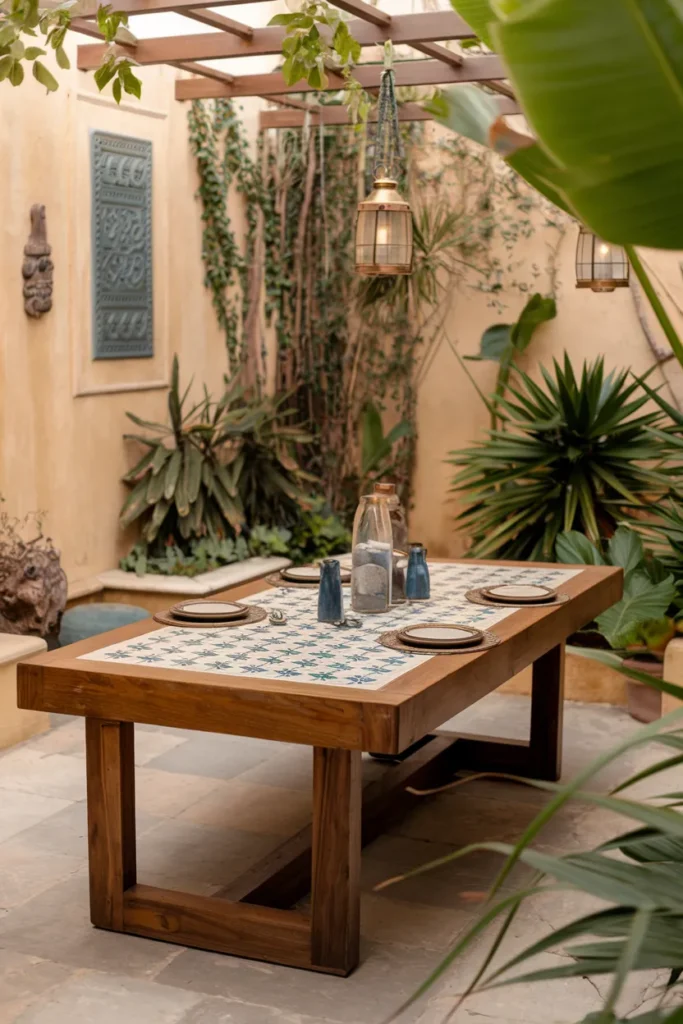
You want color pops and easy clean-up? Tile inlay looks custom without designer pricing.
Why it works
Tile protects the hot-plate zone and upgrades style in one move.
Materials & specs
- Top: Plywood substrate + cement board + porcelain or encaustic tiles
- Edge: Hardwood frame
- Grout: Outdoor flexible grout + sealer
- Skill: Intermediate
Build notes
- Recess the center panel to sit tiles flush.
- Dry-lay the pattern before thinset.
- Use a tile edge trim for crisp lines.
11) Extendable Butterfly-Leaf Table
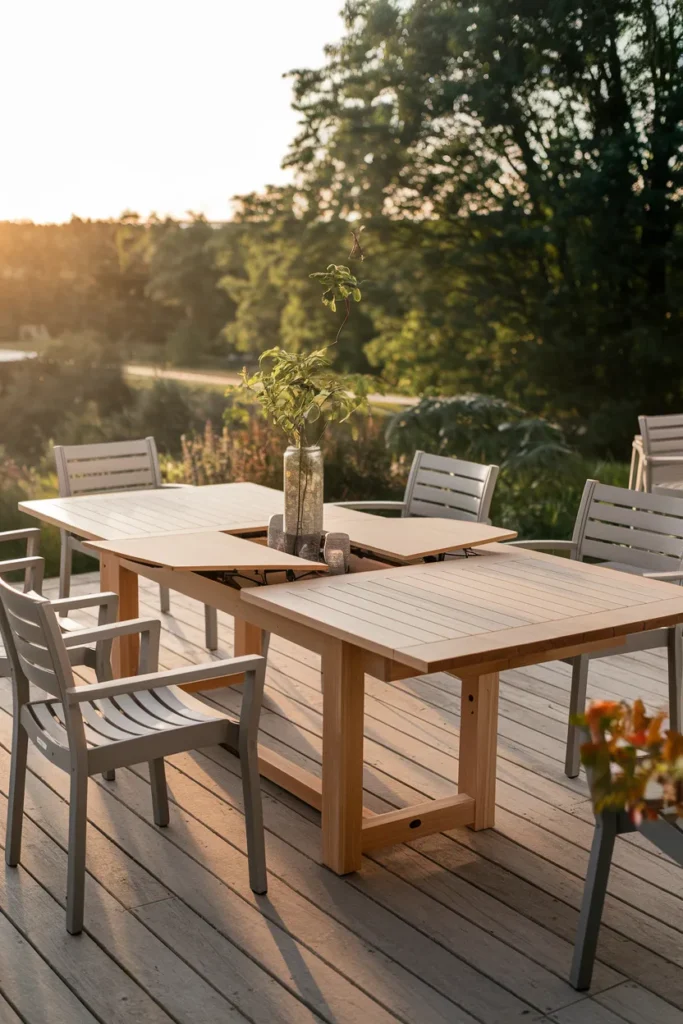
Guests doubled? Extendable saves the night.
Why it works
A butterfly leaf folds inside the table and deploys in seconds. You keep a compact footprint most days.
Materials & specs
- Mechanism: Center split top with hinged leaf
- Slides: Heavy duty table slides (full extension)
- Top: Hardwood or cedar planks
- Skill: Advanced (mechanism alignment)
Build notes
- Mortise hinges into the leaf for a flush fit.
- Align slides perfectly or the leaf misbehaves.
- Mark center lines under the top for repeatable setup.
12) X-Base Trestle Table
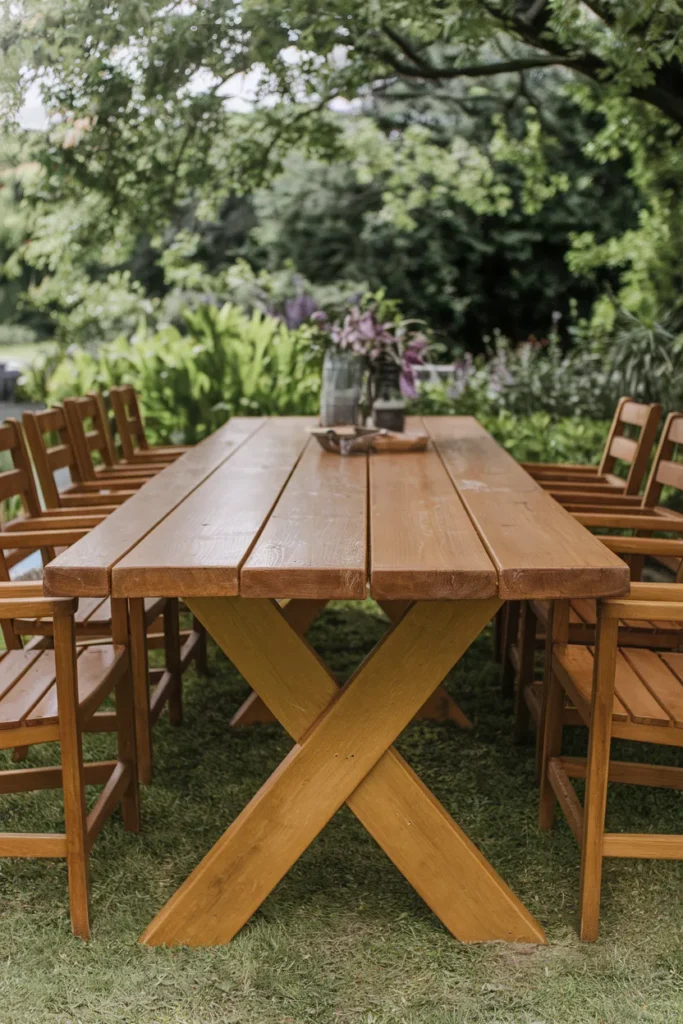
You want muscle and elegance? The X-base shows both.
Why it works
The diagonal legs resist racking and look sculptural. The stretcher anchors everything.
Materials & specs
- Lumber: 4×4 legs, 2×8 stretcher
- Joinery: Through-bolt or draw-bore style with faux pegs
- Seats: 8–10
- Skill: Intermediate
Build notes
- Cut matching angles for both Xs.
- Notch the stretcher to lock in.
- Add adjustable feet to fight uneven pavers.
13) Steel Hairpin-Leg Cedar Table
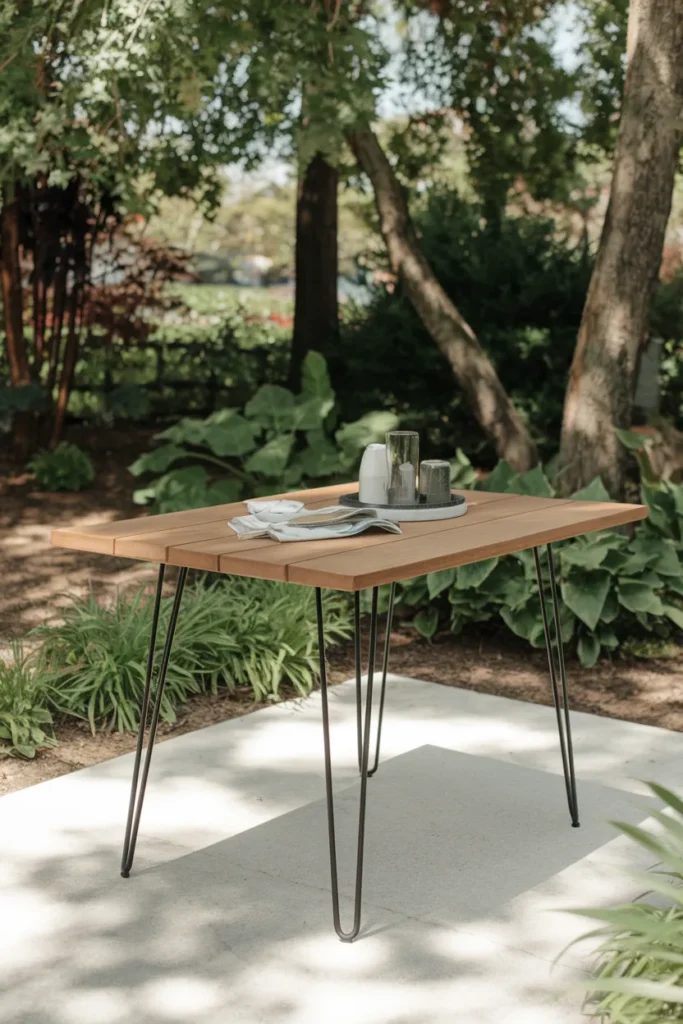
You want light and airy? Hairpin legs keep things modern and quick to build.
Why it works
Steel legs bolt on in minutes and create a floating look. Cedar keeps weight low.
Materials & specs
- Top: 1½” thick laminated cedar
- Legs: 28″ outdoor-rated steel hairpins
- Finish: UV oil on cedar, clear coat on steel
- Skill: Beginner
Build notes
- Add threaded inserts to remove legs for storage.
- Use three support cleats under long tops.
- Cap screw heads with black washers for style.
14) Live-Edge Picnic Luxe
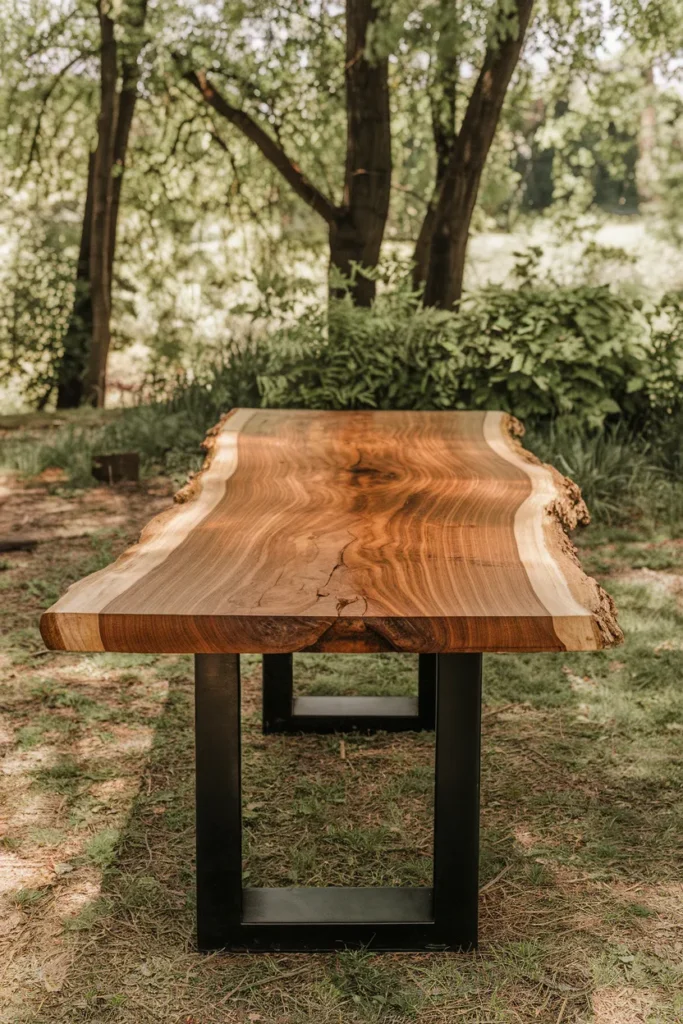
You want nature on your patio? Live-edge slabs bring wild grain and curves.
Why it works
The raw edges feel organic and unique. Everyone asks where you bought it.
Materials & specs
- Top: Live-edge hardwood slabs joined centerline
- Base: Simple steel rectangle or 4×4 wood legs
- Finish: UV-resistant oil, optional epoxy fill for voids
- Skill: Intermediate
Build notes
- Flatten slabs with a router sled.
- Book-match if you want mirror grain.
- Fill cracks with tinted epoxy for drama.
15) Modular Bench-Mate Table
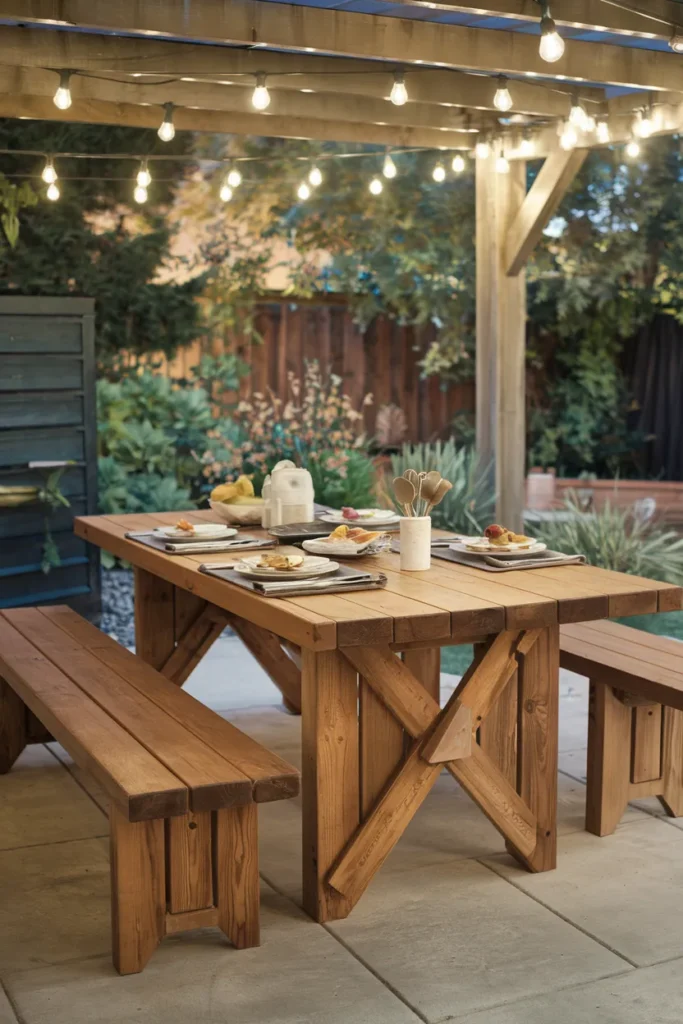
You like flexible seating? Build a table + bench system that moves like Lego.
Why it works
Benches boost capacity fast and slide under the table to save space.
Materials & specs
- Top: 2×6 planks
- Benches: Matching 2×4 frames, 14–16″ seat height
- Finish: Same as table for a unified set
- Skill: Beginner–Intermediate
Build notes
- Match bench length to table apron minus 2″.
- Add felt pads for silent slides.
- Keep bench depth 14–16″ for comfort.
16) Hex Table for Tight Corners
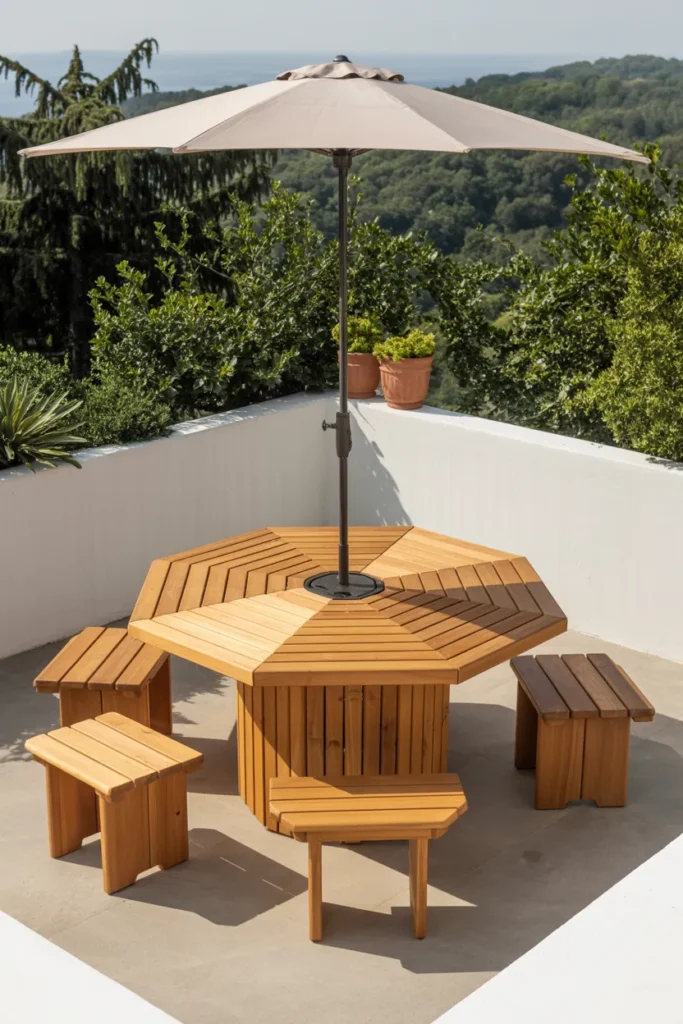
Awkward patio nook? A hexagon fits where rectangles sulk.
Why it works
Six equal sides pack lots of seating into odd spaces and look intentional.
Materials & specs
- Top: Hex cut from laminated boards
- Base: Central pedestal with six feet or six-leg perimeter
- Finish: Weatherproof oil
- Skill: Intermediate (angle cuts)
Build notes
- Use 30° miters for top segments.
- Keep feet wide for stability.
- Add a parasol hole at center.
17) Bistro-Height Bar Table
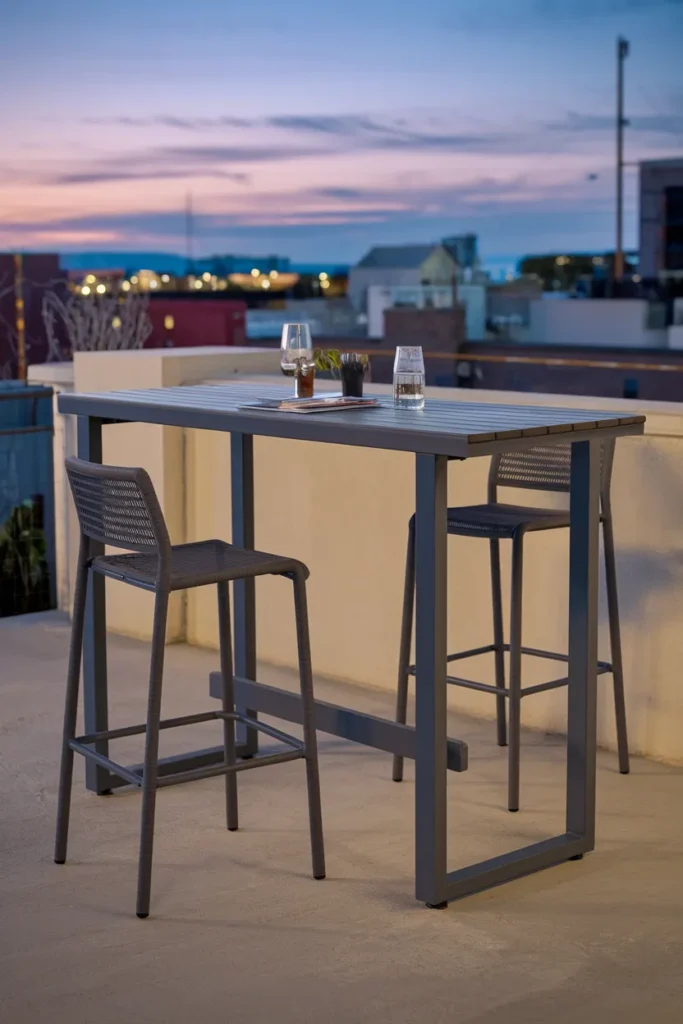
Your crew stands and chats? Go counter or bar height and lean in.
Why it works
Higher surfaces feel lively and maximize small decks. Stools slide away cleanly.
Materials & specs
- Height: 36″ counter or 42″ bar
- Top: 30–36″ wide, long and narrow
- Base: 4×4 legs, footrest stretcher
- Skill: Beginner–Intermediate
Build notes
- Add a front foot rail at 12″ off the ground.
- Keep top narrow for balcony rails.
- Anchor to wall if windy.
18) Chevron-Top With Black Angle Iron
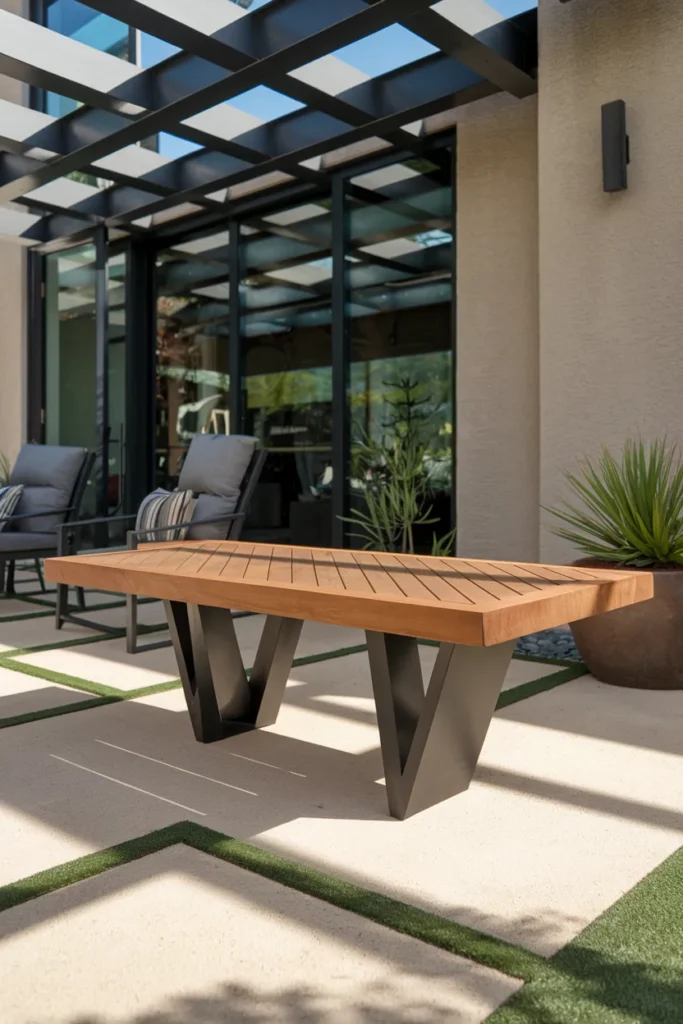
You want modern drama? Chevron boards with angle-iron edging deliver it.
Why it works
Metal frames protect edges and frame the pattern like artwork.
Materials & specs
- Top: 1×4 cedar in chevron layout
- Edge: 1½” angle iron, mitered corners, countersunk screws
- Base: Welded or wood trestle
- Skill: Intermediate (metal cutting)
Build notes
- Pre-drill steel and treat cut edges.
- Level boards flush to the iron lip.
- Use dark penetrating oil for tone contrast.
19) Lightweight Aluminum-Frame Topper
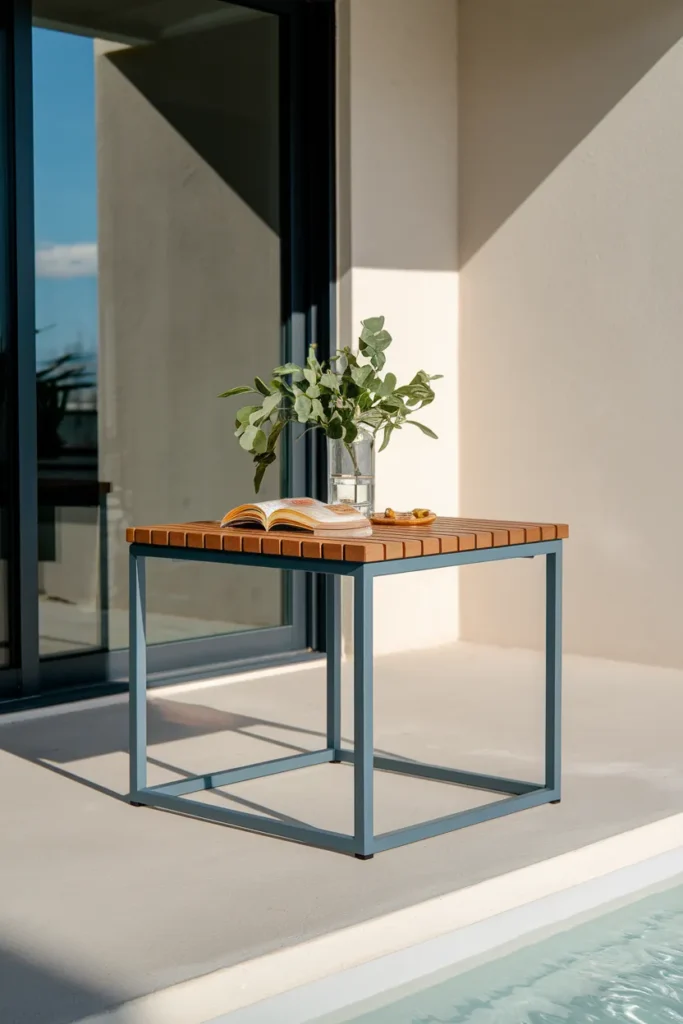
You move furniture a lot? Build a light aluminum frame and drop a wood or composite top.
Why it works
Aluminum resists rust and keeps everything easy to lift. Composite top reduces maintenance.
Materials & specs
- Frame: 1.5″ aluminum square tube (bolted brackets if no welding)
- Top: Composite decking or bamboo panels
- Finish: Clear anodized look or powder-coat
- Skill: Intermediate
Build notes
- Use corner brackets and stainless hardware.
- Add cross braces every 18–24″.
- Bond composite boards with hidden fasteners.
20) Tile-Top Grill-Side Prep + Dining Hybrid
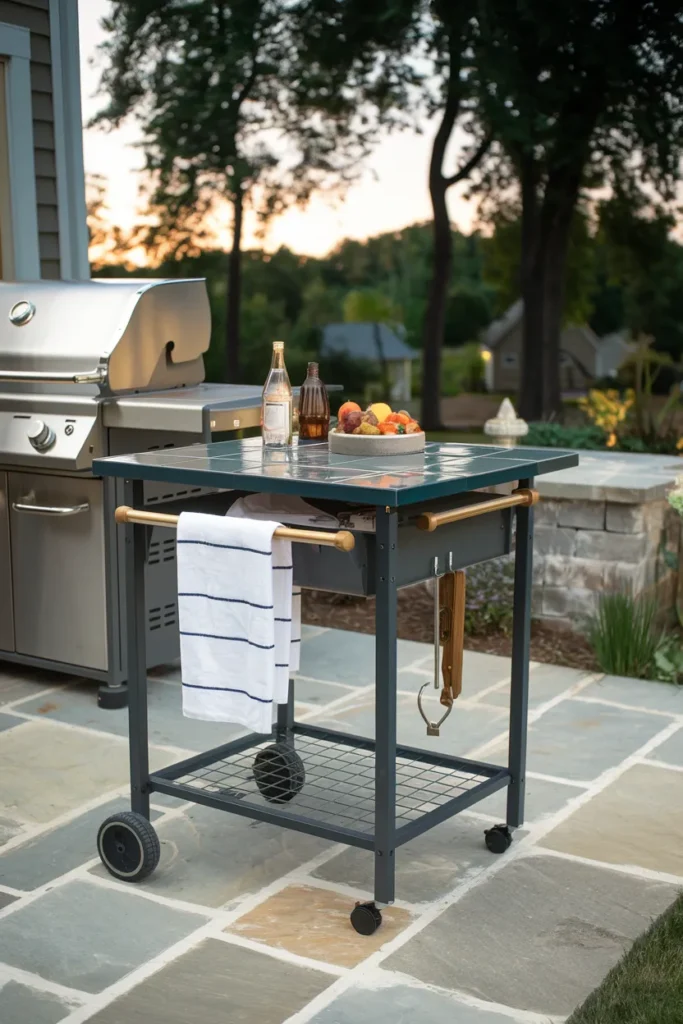
You want a workhorse that doubles as a prep station? This hybrid handles hot pans and hungry people.
Why it works
A tiled or stone top near the grill survives heat and cleans fast. You dine on one end and chop on the other.
Materials & specs
- Top: Porcelain tile or granite remnant on cement board
- Base: Pressure-treated frame with locking casters
- Extras: Towel bar, hooks, drop-in ice bin
- Skill: Intermediate
Build notes
- Split the top into “prep zone” and “eating zone.”
- Add a raised edge to stop rolling cans (I learn fast).
- Lock casters during cutting and serving.
Finishes that actually last (and look good)
You want that table to survive weather and look great next year. I tested more finishes than I care to admit. I now stick to three paths:
- Penetrating oil with UV blockers (easiest upkeep):
- Soaks in, enhances grain, simple recoats.
- Re-oil lightly every season.
- Great for cedar, teak, ipe.
- Spar urethane or marine varnish (shiny and tough):
- Flexible film resists sun and water.
- Sand lightly and refresh yearly.
- Best when you want a richer sheen.
- Exterior paint (maximum color + protection):
- Seals wood fully and hides fillers.
- Prime first; touch up chips fast.
- Perfect for modern black bases or bold color tops.
Key takeaways:
- Seal end grain twice.
- Add table feet to keep wood off wet stone.
- Avoid trapping water under the top—ventilate bases.
Sizing cheat sheet (because guesswork bites)
You want good proportions and comfortable seating? Use these sanity-check numbers:
- Table height: 29–30″ (dining), 36″ (counter), 42″ (bar)
- Seat height: 17–18″ (dining chairs), 24–26″ (counter stools), 29–30″ (bar stools)
- Legroom clearance: 12″ from seat to underside of top
- Place setting width: 24″ per person
- Common sizes:
- 72″ × 36″ seats 6–8
- 84″ × 40″ seats 8–10
- Round 48–54″ seats 4–6
Pro tip: Leave 36–48″ walkway space around the table. Your shins will thank you.
Hardware that saves headaches
I value hardware that tightens, realigns, and survives storms.
- Pocket-hole screws for fast assembly (use exterior-rated).
- Cross-grain tabletop fasteners (figure-8 or Z-clips) so tops can move with humidity.
- Threaded inserts for removable legs.
- Stainless or coated deck screws for everything exposed.
- Leveling feet for patios that slope like ski runs.
Smart budgeting (so you keep money for the food)
You can build every table here on three budget tiers:
- Low: 2× lumber + exterior screws + oil finish.
- Medium: Cedar/cypress tops, painted bases, better hardware.
- High: Live-edge slabs, composite or tile tops, steel bases.
Where to save: hidden frames, simple joinery, DIY finishes.
Where to invest: top surface and hardware. That combo wins long term, IMO.
My field notes (so you win on the first try)
I built in both desert sun and wet coastal air. I tested oils, urethanes, and paints on offcuts, then left them outside for months. I watched some finishes peel, some fade, and some flex and stay gorgeous. I now sand to 120, wipe with mineral spirits, and finish same day. I avoid passive maintenance, because passive turns into “why is my table gray.” I also route a tiny chamfer on edges so knocks don’t look like disasters.
I also learned to level the table where it actually lives. I used shims and then installed adjustable feet, because patios love to tilt. I now keep a tiny maintenance kit in a bin: oil, brush, rags, 220 grit paper, hex key, spare screws. When the table looks thirsty, I refresh before the weekend hits. Quick habit, big payoff.
And yes, I overbuild stretchers now. I like zero wobble. Who doesn’t?
Wrapping up with your next move
You now hold 20 battle-tested ideas to build a table that fits your space, your budget, and your vibe. You can go clean and modern, rustic and rugged, or compact and clever. You can handle weeknight dinners and birthday crowds without breaking a sweat (or a stretcher).
Pick one design, sketch your dimensions, and grab materials with a legit cut list. Seal edges, add adjustable feet, and finish the top like you mean it. Then text your friends and fire up the grill. Your patio just became everyone’s favorite room. And if someone asks where you bought your table, enjoy the grin when you say, “I built it.” IMO, that line never gets old. 😉

