10 DIY Chandeliers You Can Build on a Budget
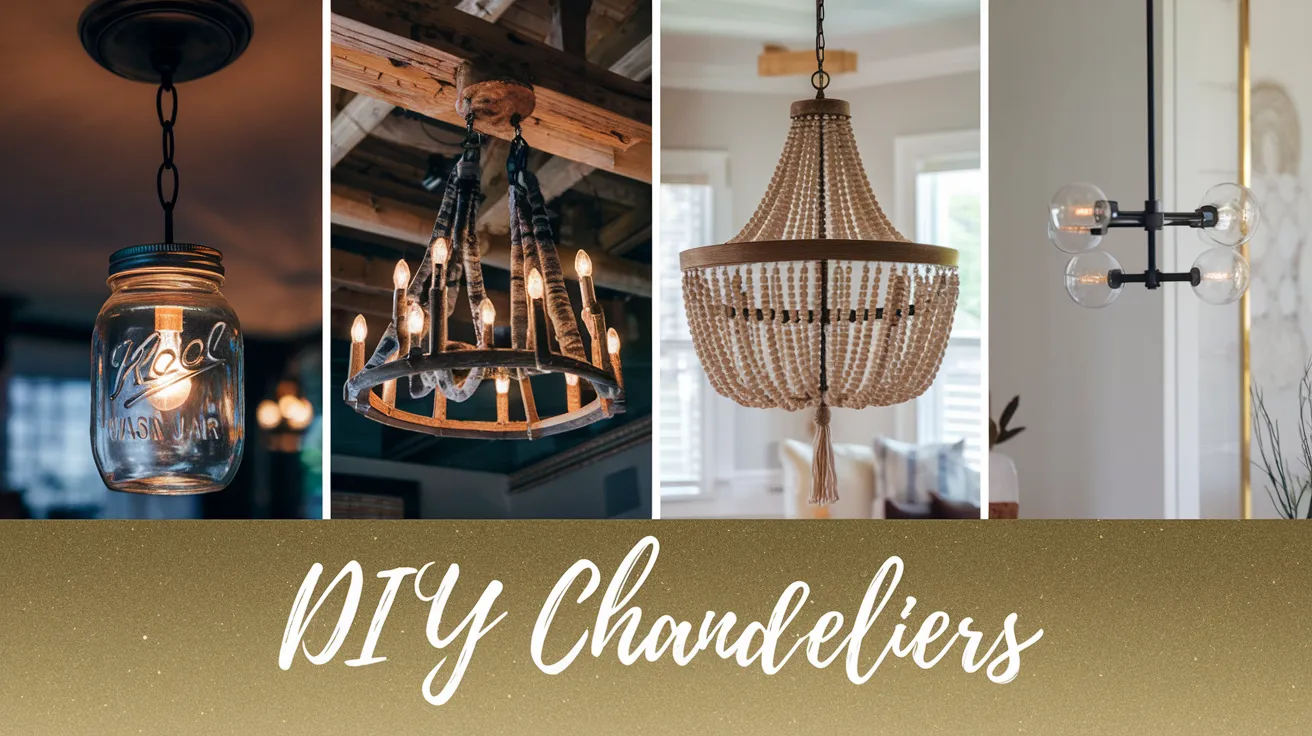
Let’s be honest. You’ve scrolled through Pinterest, drooled over those magnificent, thousand-dollar chandeliers, and then promptly closed the app after checking the price tag. I’ve been there. My bank account has a personal vendetta against my expensive taste in home decor. But what if I told you that you could get that high-end look without selling a kidney?
I’m a firm believer that a tight budget is just an invitation to get creative. After a few too many failed (and frankly, hazardous) lighting experiments in my own home, I’ve curated a list of stunning DIY chandeliers that look like a million bucks but cost next to nothing. So, grab a cup of coffee, and let’s talk about how you can light up your life—literally—without breaking the bank.
Before You Start: The DIY Chandelier Toolkit
Before we get into the fun stuff, let’s cover the basics. Most of these projects require a few common tools and materials. Having these on hand will make your life infinitely easier and prevent those multiple, soul-crushing trips to the hardware store. Trust me on this.
Essential Supplies
Most projects will start with a base structure and a lighting kit. Here’s what you’ll generally need:
- A Base: This is the skeleton of your chandelier. Think old lampshades, embroidery hoops, wire wreaths, or even a hula hoop. Anything circular or with a frame you can build upon works wonders.
- A Pendant Light Kit: This is non-negotiable unless you’re a certified electrician. These kits come with the socket, cord, and plug, making the electrical part safe and simple. You can find them online or at any home improvement store for cheap.
- The “Wow” Factor: This is the material that will make your chandelier yours. It could be beads, crystals, rope, fabric, paper, or even mason jars. This is where your creativity shines.
- Adhesive and Fasteners: Depending on your project, you’ll need a reliable way to attach everything. Hot glue guns, E6000 craft adhesive, zip ties, and floral wire will become your best friends.
Essential Tools
Having the right tools is half the battle. You don’t need a professional workshop, just a few key items:
- Wire cutters
- Pliers (needle-nose are particularly useful)
- A sharp pair of scissors or a craft knife
- A reliable hot glue gun
- A ruler or measuring tape
Alright, prep work is done. Let’s get to the good stuff.
1. The Elegant Beaded Chandelier
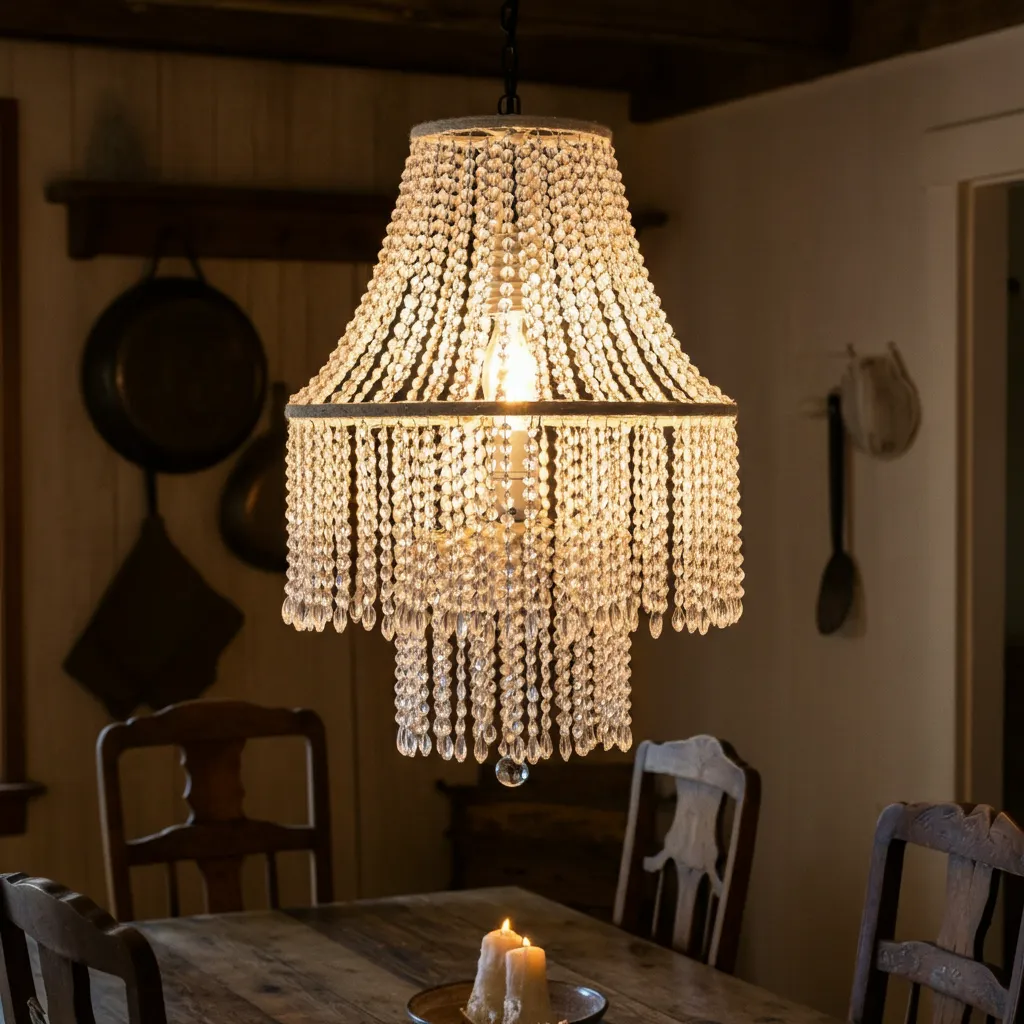
This is the classic DIY chandelier. It’s timeless, surprisingly easy, and gives you that sparkly, dramatic effect without the Pottery Barn price tag. I made one for my dining room, and guests always assume it was a fancy boutique find.
Why You’ll Love It
It’s incredibly customizable. You can use clear acrylic beads for a crystal look, wooden beads for a bohemian vibe, or colorful beads for a playful touch. The possibilities are endless.
What You’ll Need:
- An old lampshade frame or a couple of metal craft hoops (one large, one smaller)
- Strands of acrylic or glass beads (buy in bulk online for the best price)
- Fishing line or jewelry wire
- A pendant light kit
- Spray paint (optional, for the frame)
The Process:
Start by painting your frame if you want a uniform color. Once it’s dry, tie long strands of fishing line to the larger, top hoop. String your beads onto the line, and then attach the other end to the smaller, bottom hoop. You can create swags, straight lines, or alternating lengths—it’s all up to you. Finally, suspend the pendant light kit right through the center. The key is patience; stringing beads can be tedious, but the result is absolutely worth it.
2. The Rustic Farmhouse Mason Jar Chandelier
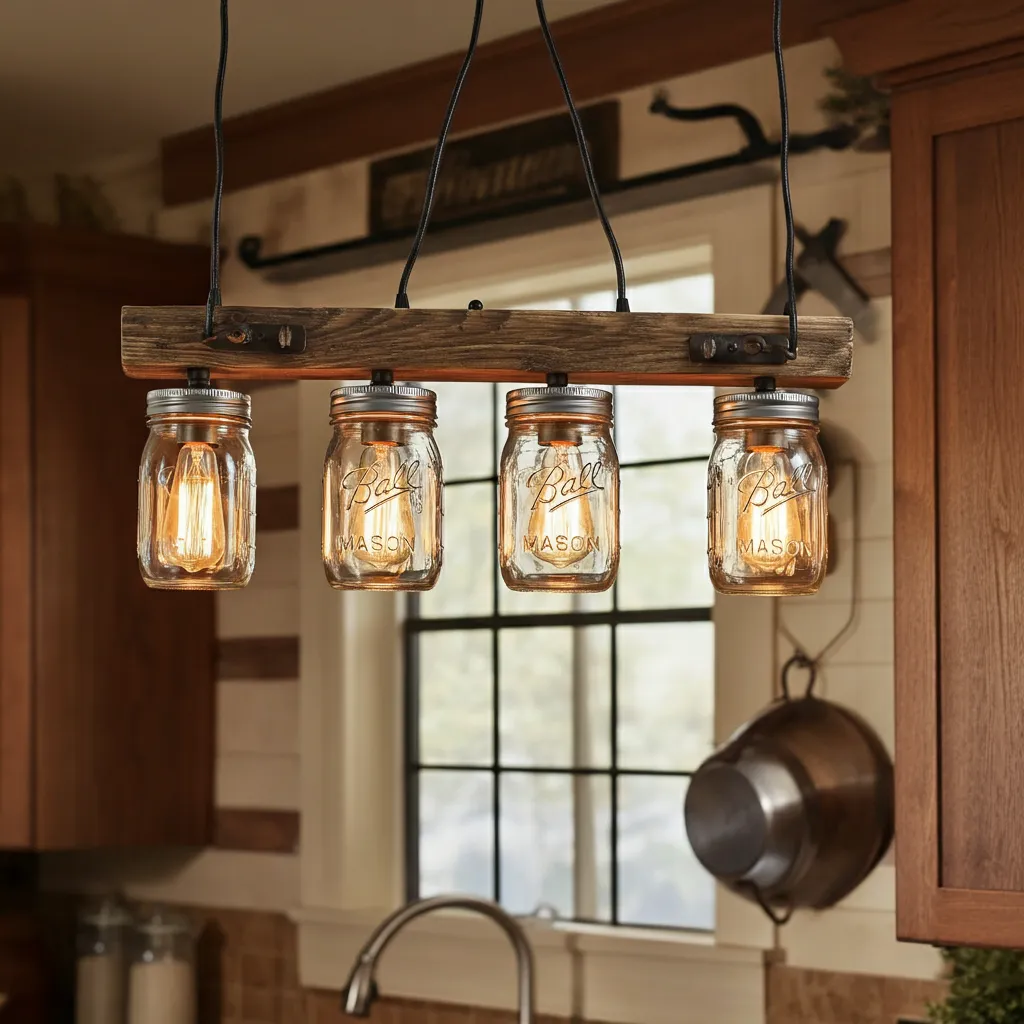
Is it even a DIY list without a mason jar project? Kidding aside, this one is popular for a reason. It delivers a warm, rustic charm that’s perfect for kitchens, dining areas, or even a covered porch.
Why You’ll Love It
It’s rugged, charming, and a fantastic way to upcycle all those jars you’ve been hoarding. It casts a beautifully warm and diffused light, creating an instant cozy atmosphere.
What You’ll Need:
- A round piece of wood or a rustic plank
- Several mason jars (3-5 usually works well)
- An equal number of pendant light kits
- A drill with a hole saw bit (to cut holes in the wood for the cords)
- Hooks and chain for hanging
The Process:
First, decide on your layout and drill holes in your wooden plank where you want each jar to hang. You’ll feed the cord of each pendant kit through a hole, letting the socket hang down. You can wrap the cords around the plank for a more rustic look or let them hang straight at varying lengths. No need to drill the jars themselves; just place the bulb and socket inside. Make sure the wood is securely mounted to the ceiling, as this fixture can get heavy.
3. The Modern Geometric Himmeli Chandelier
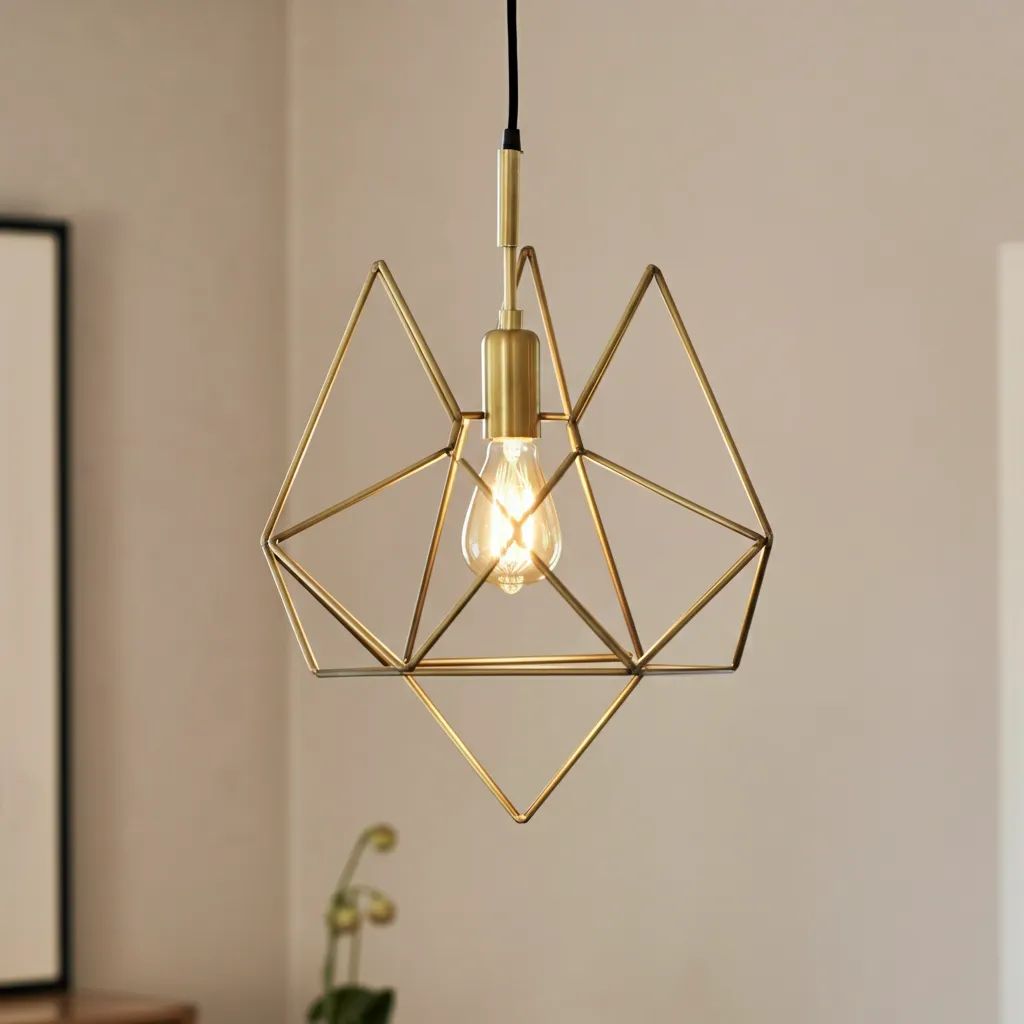
If your style leans more modern or Scandinavian, this one’s for you. “Himmeli” are traditional Finnish ornaments made from straw, but we’re going to use metal tubing for a sleek, contemporary look. It’s more of a light sculpture than a traditional chandelier.
Why You’ll Love It
It’s an absolute statement piece. The clean lines and sharp angles create a minimalist yet dramatic focal point. Plus, you get to tell everyone you made a Himmeli. Sounds impressive, right?
What You’ll Need:
- Brass or copper tubing (you can find this at a hobby or hardware store)
- Thin-gauge wire (brass or copper to match)
- A tube cutter or a small pipe cutter
- A pendant light kit
The Process:
This project is basically adult geometry. You’ll cut your tubing into various lengths and thread them onto the wire to create 3D geometric shapes—diamonds, pyramids, and cubes are popular choices. Connect the shapes to build a larger, more complex structure. IMO, the more abstract and asymmetrical, the better. Once your sculpture is complete, just hang the pendant light kit right in the middle. The light bulb becomes part of the art.
4. The Bohemian Tassel Chandelier
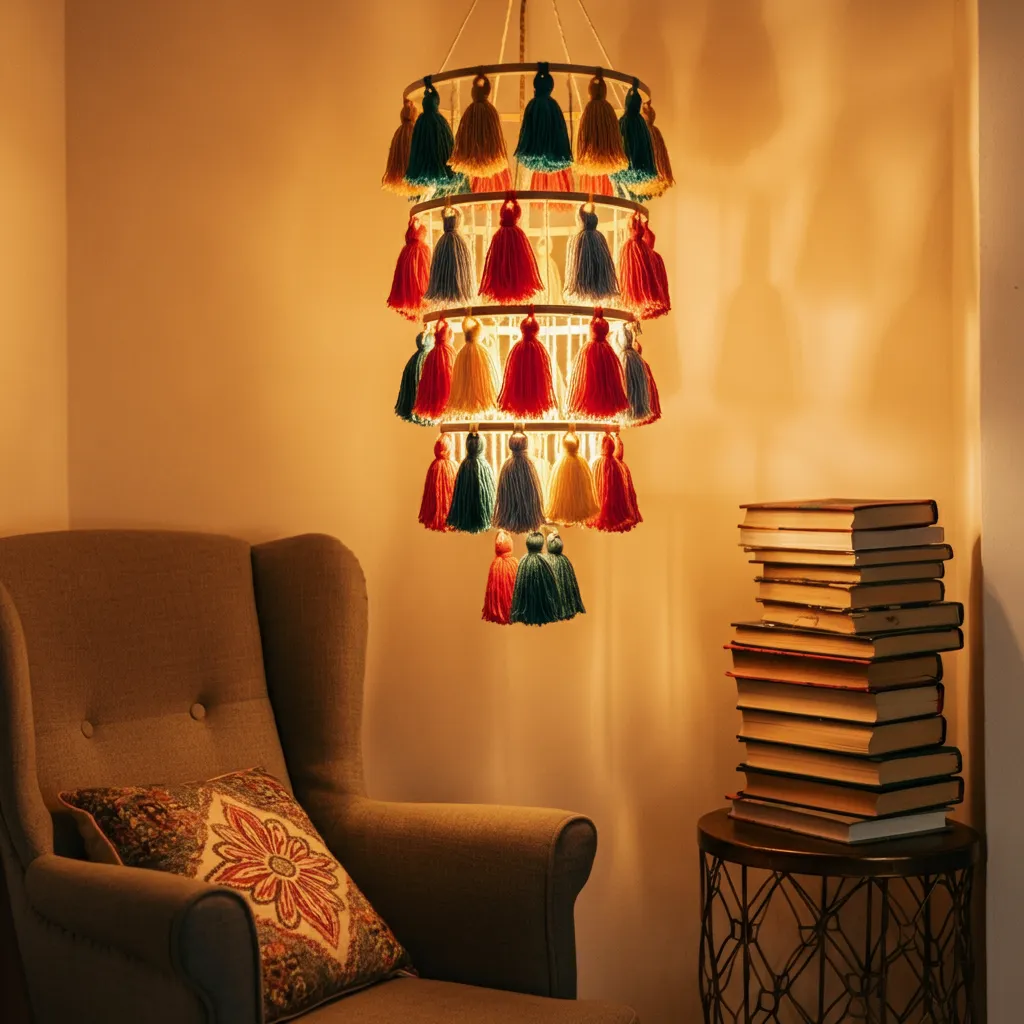
For those who love texture and a free-spirited vibe, the tassel chandelier is a dream. It’s soft, full of movement, and adds a touch of boho chic to any room. I put a small one in my reading nook, and it’s my favorite corner of the house.
Why You’ll Love It
It’s a “no-tools-required” kind of project, making it perfect for beginner DIYers. Plus, it’s incredibly forgiving. A slightly uneven tassel just adds to the handmade charm, right? 🙂
What You’ll Need:
- Embroidery hoops (two or three in different sizes)
- Lots of yarn or macrame cord in your chosen color(s)
- A pair of scissors
- A pendant light kit
The Process:
The bulk of your time will be spent making tassels. Lots and lots of tassels. Wrap yarn around a piece of cardboard, tie it off at the top, and cut the bottom loops to create a tassel. Once you have a mountain of them, start tying them to your embroidery hoops. You can stack the hoops vertically to create a tiered effect. The fuller, the better, so don’t be shy with the number of tassels. Drape the pendant light cord through the center, and you’re done!
5. The Industrial Pipe Chandelier
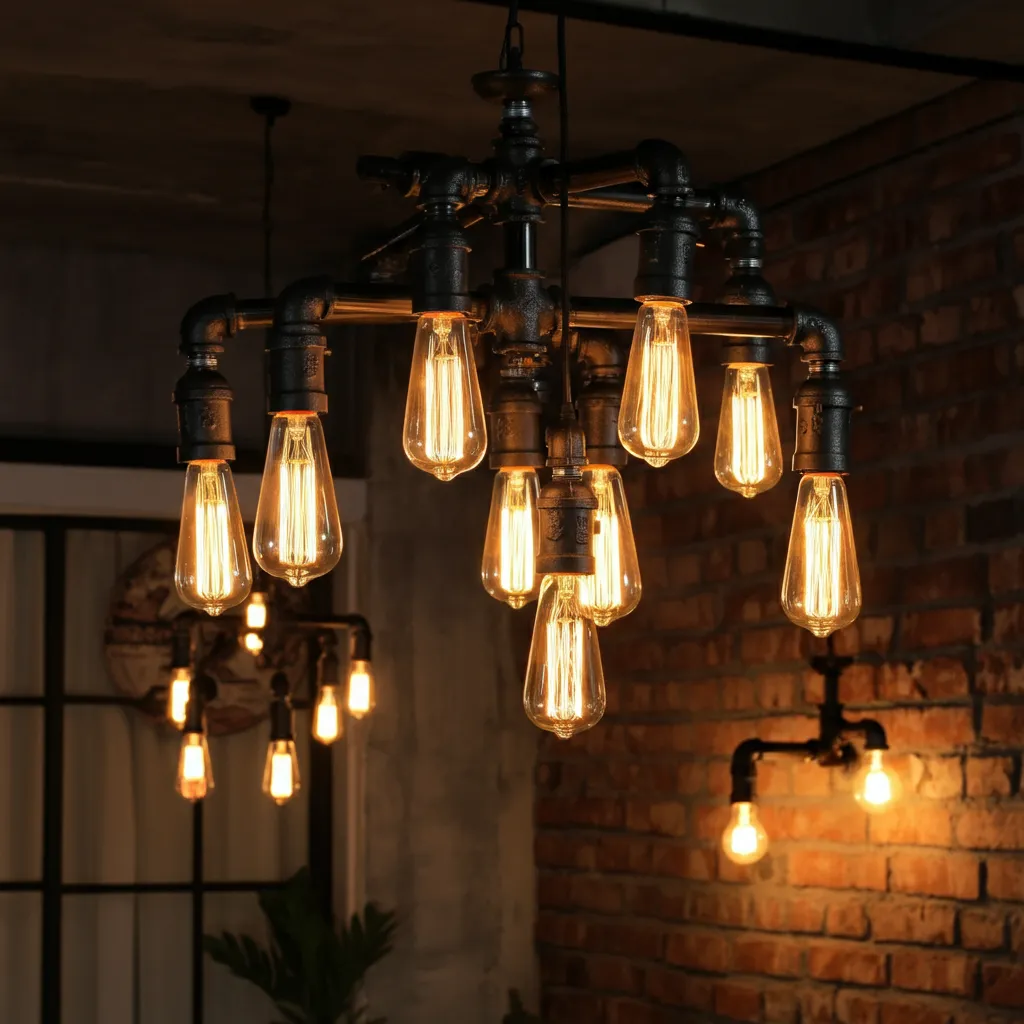
Ready to feel like a master builder? This industrial pipe chandelier looks like it came from a trendy loft apartment but is surprisingly simple to assemble. It’s all about screwing pipes together.
Why You’ll Love It
It’s bold, edgy, and incredibly durable. This isn’t some flimsy fixture; it has real weight and presence. You can design it in any configuration you want, from a simple line to a complex candelabra shape.
What You’ll Need:
- Black or galvanized steel pipes and fittings (elbows, tees, flanges)
- Pendant light kits or individual sockets and wiring
- Edison-style light bulbs (these are a must for the industrial look)
- A can of spray paint (optional, for a custom color)
The Process:
Think of it as adult LEGOs. Lay out your design on the floor first. Once you have a shape you like, simply screw all the pipe pieces together. You may need to use a pipe wrench to get them really tight. Wire the sockets and run the cords through the pipes, having them all meet at a central point for hanging. This one is a bit more involved with wiring, so if you’re not comfortable with electrical work, please consult an electrician. Safety first, people.
6. The Delicate Coffee Filter Chandelier
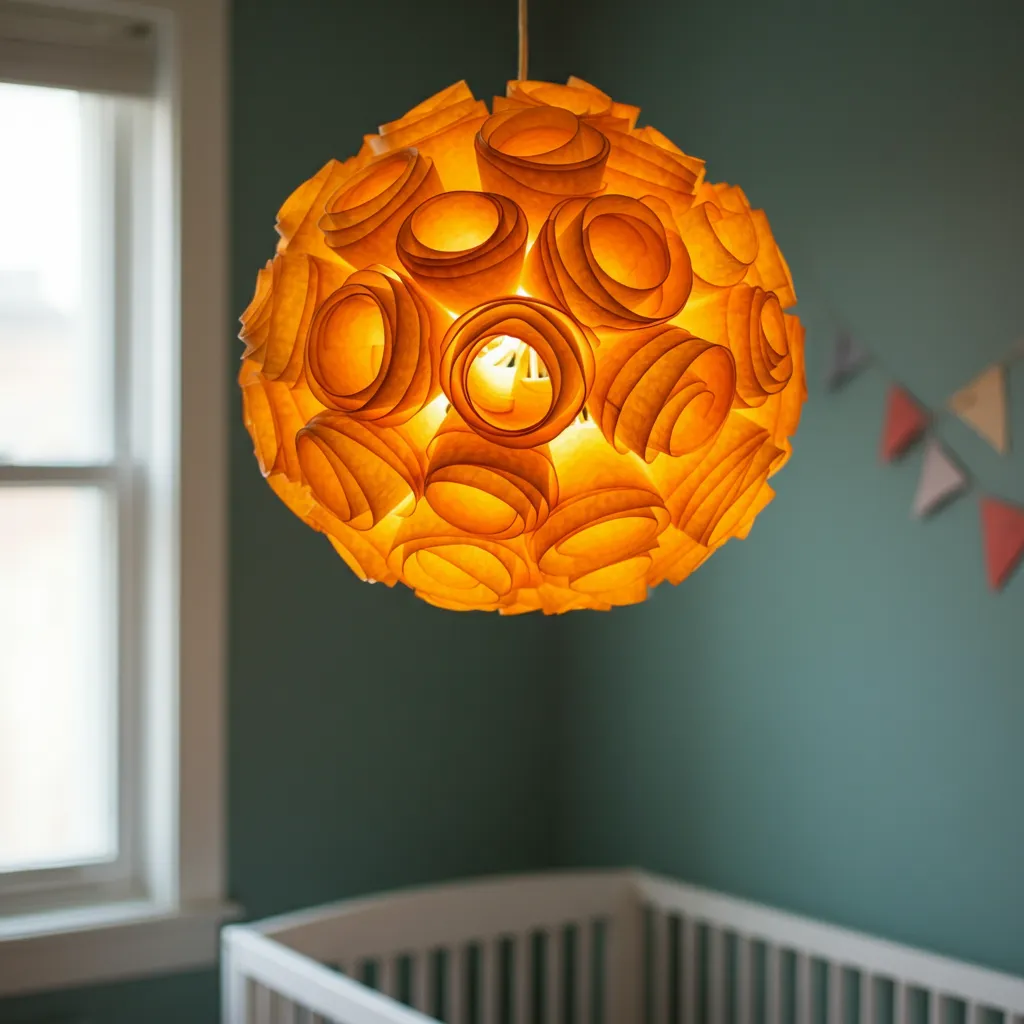
Yes, you read that right. Coffee filters. This might be the cheapest project on the list, but it looks shockingly luxe. When layered, the flimsy filters transform into a soft, ethereal, peony-like sphere of light.
Why You’ll Love It
It’s unbelievably inexpensive and has a massive visual impact. It’s perfect for a bedroom or nursery, creating a soft, dreamy glow. The best part? No one will ever guess what it’s made of.
What You’ll Need:
- A paper lantern (this is your base)
- Hundreds of coffee filters (the basket kind, not the cone ones)
- A hot glue gun and plenty of glue sticks
- A light kit (most paper lanterns come with one)
The Process:
This is another project where you’ll want to put on a good podcast because it’s all about repetition. Fold a coffee filter in half, then in half again to create a ruffled cone shape. Put a dot of hot glue on the pointed end and stick it to the paper lantern. Repeat this process about a million times, placing the filters close together to create a full, fluffy texture. Start from the bottom and work your way up to make layering easier. It’s a labor of love, but the final product is stunning.
7. The Nautical Rope Chandelier
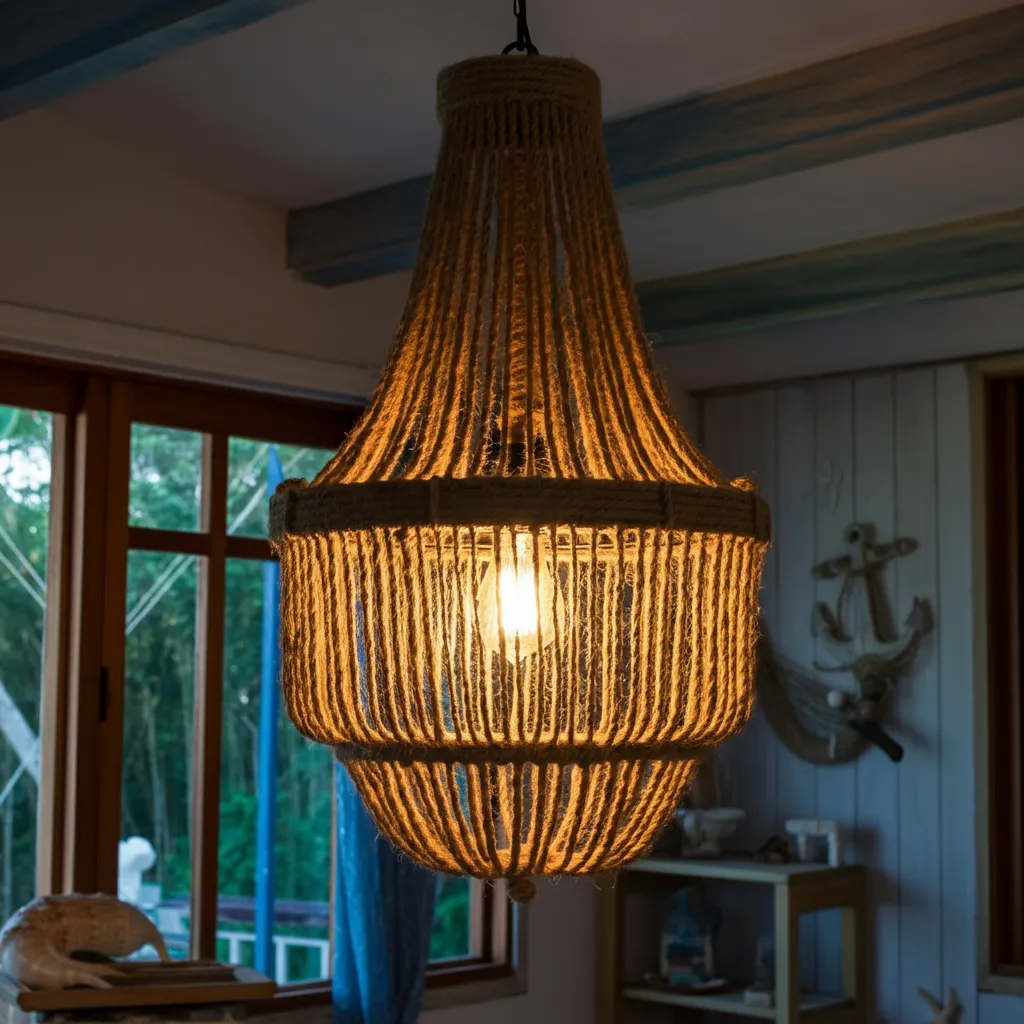
Bring a touch of the coast into your home with a rope-wrapped chandelier. This DIY is perfect for a beach house, a boy’s room, or anyone who loves a bit of nautical flair. It’s textural, rustic, and very on-trend.
Why You’ll Love It
It adds natural texture and warmth to a space. Plus, wrapping the rope is a surprisingly therapeutic activity. It’s a great project for a lazy Sunday afternoon.
What You’ll Need:
- An old, ugly chandelier or a wire wreath frame
- Thick jute or sisal rope
- A hot glue gun
- A pendant light kit (if using a wreath frame)
The Process:
If you’re upcycling an old chandelier, just start wrapping! Use hot glue to secure the start of the rope, then tightly wrap it around every arm and surface of the fixture, adding a dab of glue every few inches to keep it secure. If you’re using a wire frame, wrap the frame first, then you can create a “net” or a basket-weave pattern inside the frame for the light to sit in. FYI, this project can get messy with shedding rope fibers, so maybe don’t do it on your white carpet.
8. The Glamorous Faux Crystal & Chain Chandelier
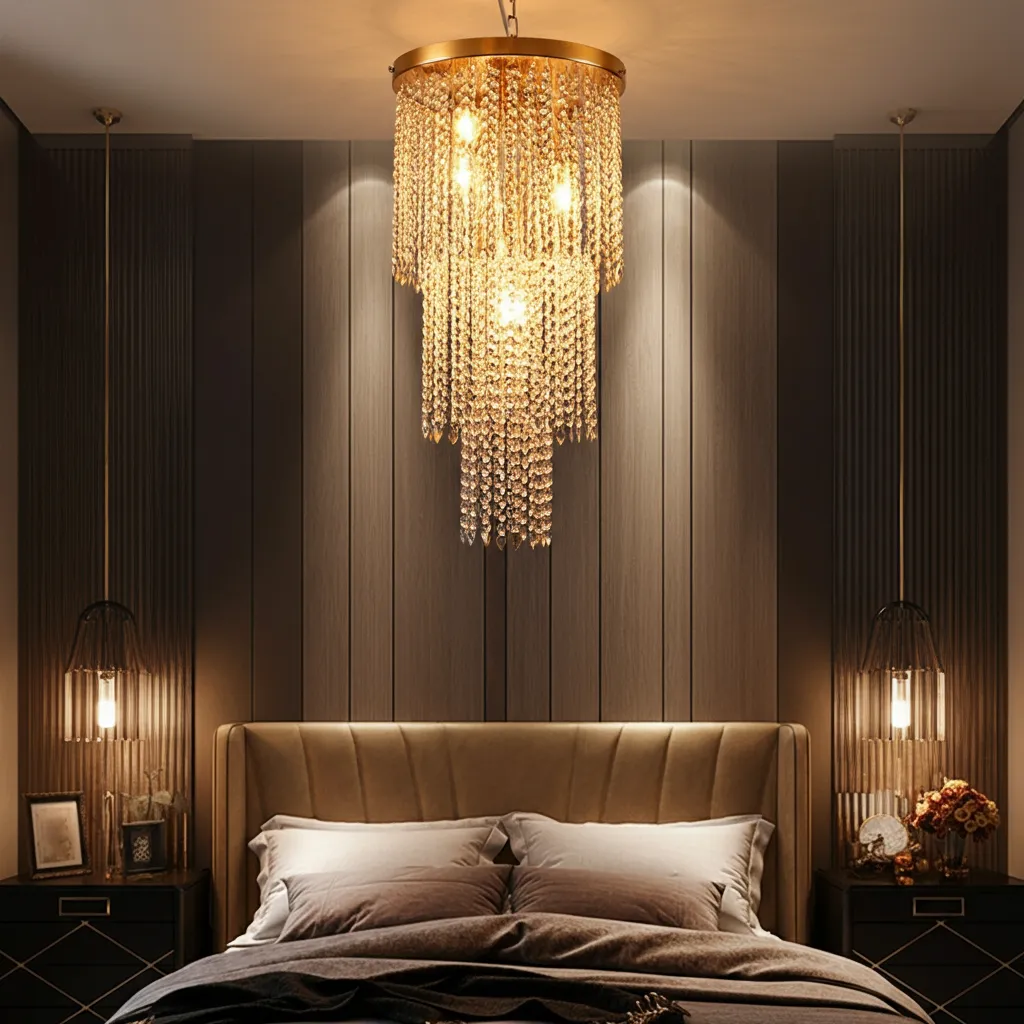
Want the glitz of a crystal chandelier with a bit of an edge? This project combines sparkly faux crystals with tough metal chains for a look that is pure rock-and-roll glamour.
Why You’ll Love It
It’s the perfect blend of feminine and masculine aesthetics. The way the light reflects off the crystals and chains is just beautiful. It’s a DIY that truly looks expensive.
What You’ll Need:
- A sturdy wire hanging basket or a lampshade frame
- Several feet of lightweight metal chain (in silver, gold, or black)
- Acrylic crystal pendants or chandelier prisms
- Jewelry pliers and wire cutters
The Process:
The first step is to cut your chains to the desired lengths. For a tiered or waterfall effect, you’ll want to vary the lengths significantly. Using your pliers, open a link on one end of a chain and attach it to your frame. On the other end, attach one of your acrylic crystals. Repeat this process, spacing the chains evenly around the frame. Mix different styles of chains and crystals for a more curated and less uniform look.
9. The Whimsical Paper Orb Chandelier
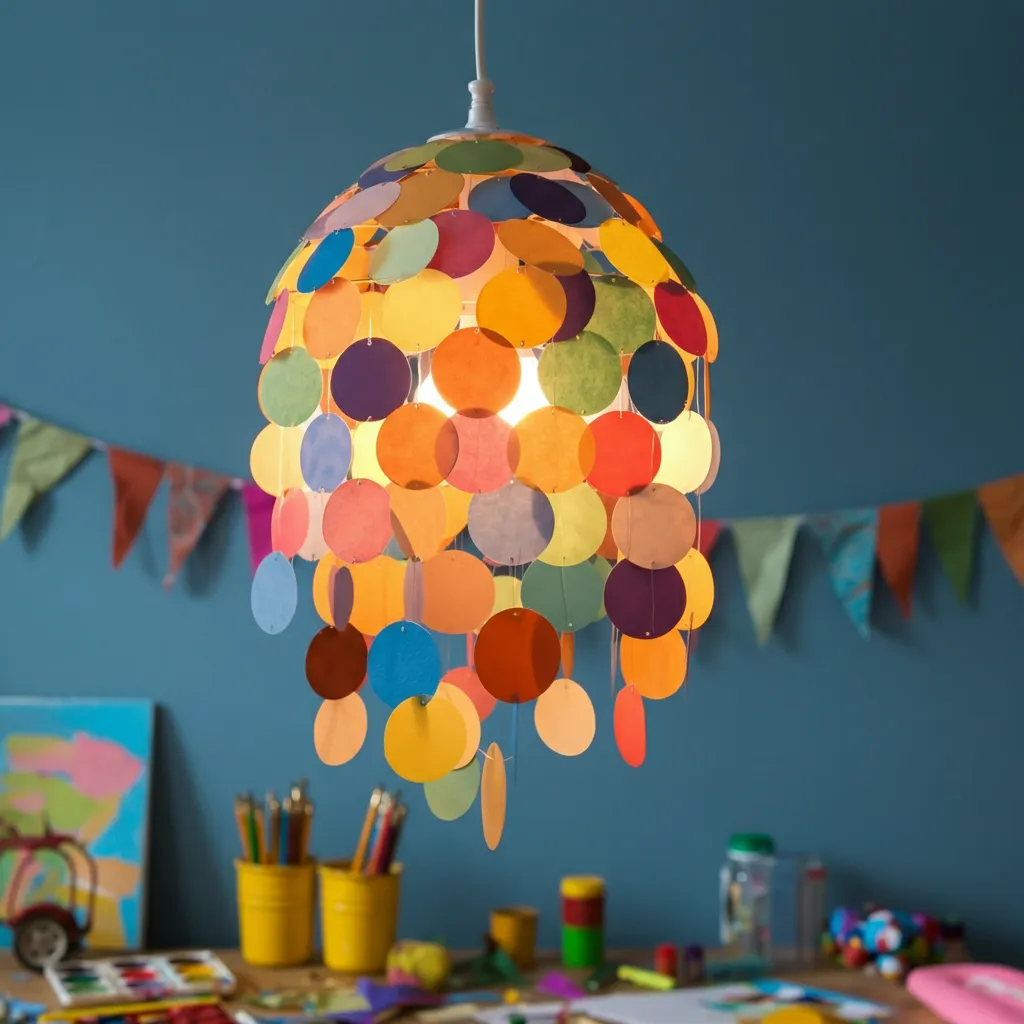
This project is similar to the coffee filter chandelier but uses circles of paper or cardstock for a more structured, modern look. It’s a fantastic way to introduce color and pattern into a room.
Why You’ll Love It
It’s another super budget-friendly option with a high-end feel. You can use scrapbook paper, old maps, book pages, or even wallpaper samples to completely personalize it.
What You’ll Need:
- A paper lantern
- Lots of cardstock or heavy paper
- A circle punch (this will save your sanity) or a compass and scissors
- Hot glue gun
The Process:
Punch out hundreds of paper circles. For a 3D effect, you can fold each circle in half. Then, just like with the coffee filter project, start gluing them onto the paper lantern in an overlapping pattern. I recommend a fish-scale pattern, starting from the bottom and working your way up. It creates a beautiful, unified texture. This is a great way to use up leftover craft paper.
10. The Wine Bottle Chandelier
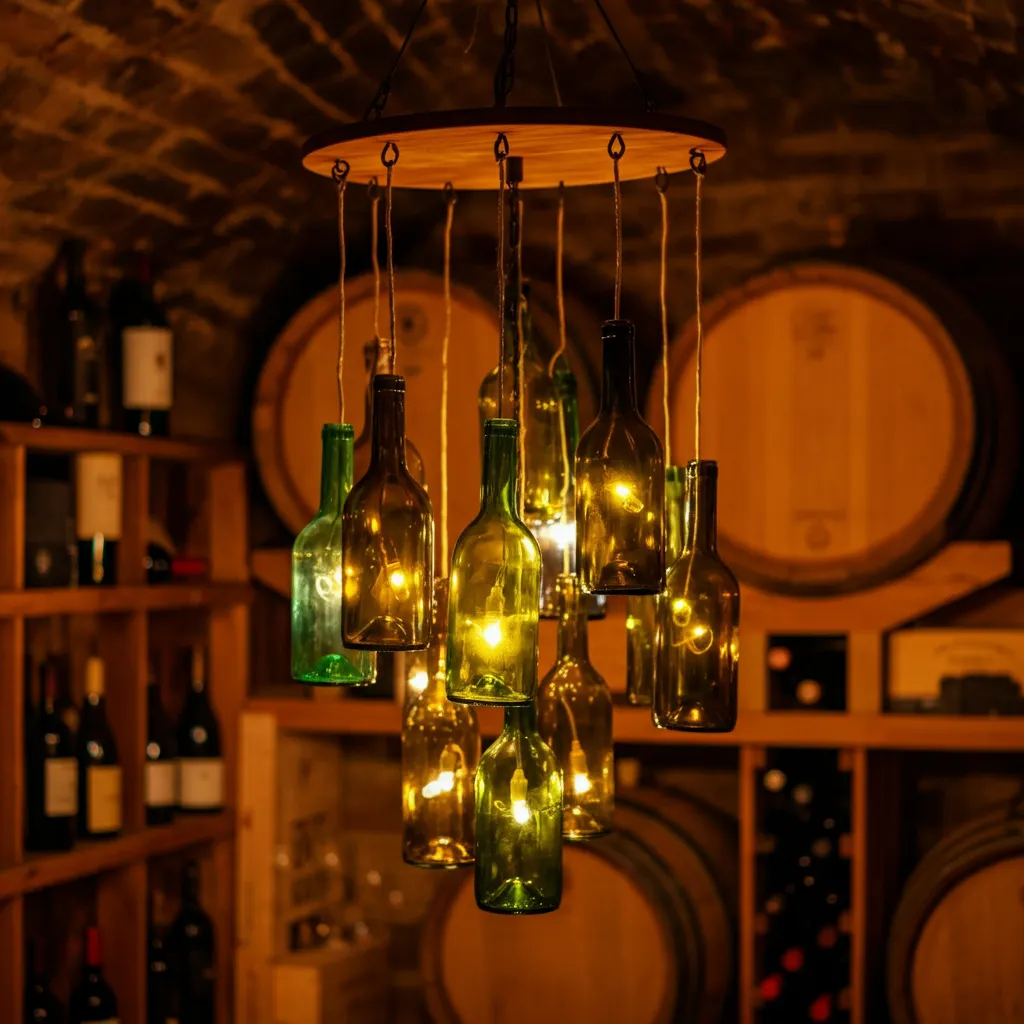
This one is for the ambitious DIYer. It requires more tools and effort, but the result is a showstopper that will have everyone talking. It’s the ultimate upcycling project for any wine lover.
Why You’ll Love It
It’s a fantastic conversation starter and a truly unique piece of art. The way the light shines through the different colored glass is absolutely gorgeous.
What You’ll Need:
- Several empty wine bottles (make sure they’re clean!)
- A bottle cutting kit
- Sandpaper
- A sturdy wooden or metal base
- Pendant light kits (one for each bottle)
The Process:
This project’s main challenge is cutting the glass. Please be extremely careful and follow the instructions on your bottle cutting kit precisely. Wear safety glasses and gloves. After you score and separate the bottom of each bottle, you’ll need to sand the edges thoroughly until they are smooth. Drill holes in your base, feed the light kits through, and let the sockets hang down inside the cut bottles. This is an advanced project, but the bragging rights are totally worth it.
Final Thoughts
So there you have it—ten ways to create a stunning chandelier without having to remortgage your house. Building your own light fixture is more than just a budget-friendly move; it’s a way to put your personal stamp on your home. You get to create something that is completely unique to you.
My final piece of advice? Don’t be afraid to experiment. If a project doesn’t turn out perfectly, who cares? You made something with your own two hands, and that’s pretty awesome. Now, which one are you going to tackle first?
