Easy DIY Gallery Wall Projects for Beginners

Staring at a big, blank wall can feel a little intimidating, right? You know it needs something, but the idea of creating a perfectly curated gallery wall seems like a job for a professional interior designer with an unlimited budget. I’ve been there. I once spent weeks with a pile of frames on my floor, too scared to put a single nail in the wall.
The good news? It’s way easier than you think. You don’t need a degree in art history or a trust fund to create a stunning gallery wall that looks like it was pulled from a magazine. You just need a plan, a little creativity, and maybe a hammer. I’m here to walk you through some simple, no-fuss gallery wall projects that even a total beginner can tackle. Let’s turn that blank space into a masterpiece that’s all you.
First Things First: The Prep Work
Before we get to the fun part, let’s cover the essentials. A little bit of prep work saves you a lot of headaches (and extra nail holes) later on. Trust me on this.
Planning Your Layout
You wouldn’t start baking a cake without a recipe, would you? The same logic applies here. Planning your layout is the most critical step. My favorite method is using paper cutouts.
- Trace Your Frames: Get some craft paper or old wrapping paper and trace each of your frames onto it. Cut them out.
- Label Them: Briefly describe the art or photo on each paper cutout so you know what’s what.
- Play with Arrangements: Use painter’s tape to stick the paper templates on your wall. You can move them around as much as you want without making a single mark. This lets you see exactly how the final arrangement will look and feel in the space.
This little trick is a game-changer. It helps you visualize spacing, balance, and the overall shape of your gallery wall before you commit. You can try a structured grid, an organic cluster, or a linear arrangement along a staircase. See what feels right for your room.
Gathering Your Tools
You don’t need a massive toolbox for this project. Most of these items you probably already have lying around.
- A hammer and nails (or picture hooks): For most lightweight frames, a simple nail will do.
- A level: This is your best friend. Nobody likes a crooked frame. A small torpedo level is perfect, but many smartphones have a level app that works in a pinch.
- A pencil: For marking your nail spots.
- A measuring tape: Essential for getting your spacing just right.
- Painter’s tape: For the layout trick I mentioned above.
Now that we have the prep out of the way, let’s get into the projects.
Project 1: The Symmetrical Grid

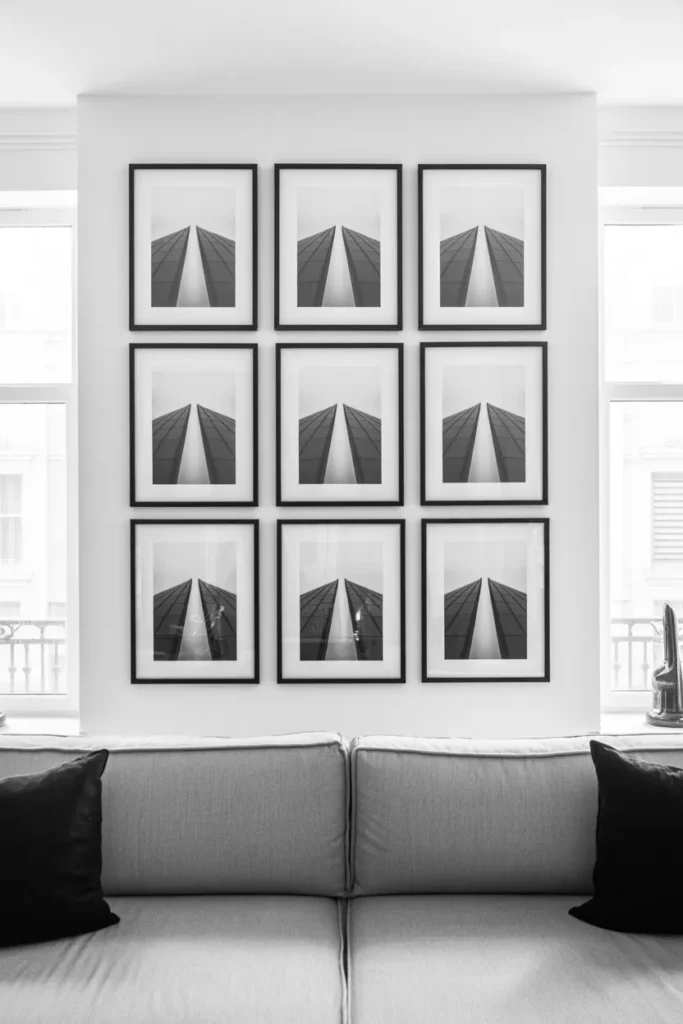
This is the classic, the go-to, the never-fails option. A symmetrical grid is perfect for beginners because it takes the guesswork out of layout design. It looks clean, organized, and sophisticated. It works especially well above a sofa, a bed, or a console table. The key here is uniformity.
What You’ll Need
- A set of identical frames. This is non-negotiable for a true grid look. You can use 6, 9, or even 12 frames depending on your wall size.
- Cohesive artwork or photos. Black and white photos, a series of botanical prints, or abstract art in a similar color palette all work beautifully.
How to Do It
The magic of the grid is in the spacing. Keep the distance between each frame exactly the same, both horizontally and vertically. I usually aim for 2-3 inches between frames. It creates a crisp, intentional look.
Use your measuring tape and level religiously for this one. Measure twice, hammer once. Start with the center frame and work your way out. Once you hang that first piece perfectly level, the rest will fall into place much more easily. It’s all about precision.
Project 2: The Organic Staircase Gallery

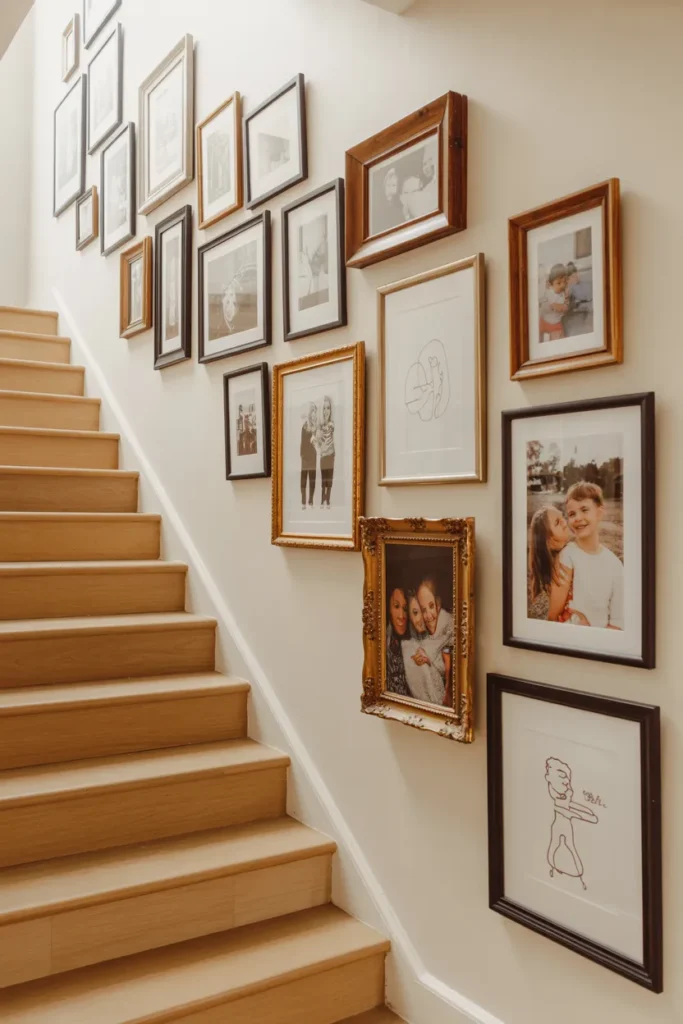
Have a staircase with a big, empty wall alongside it? This is prime real estate for a gallery wall. A staircase gallery is meant to be more organic and personal. It tells a story as you walk up or down the stairs. It’s also incredibly forgiving for beginners.
What You’ll Need
- A mix of frame sizes, styles, and finishes. This is where you can have fun! Mix black, white, wood, and metallic frames.
- A variety of personal photos, kids’ artwork, and meaningful prints. This style is all about personality.
How to Do It
The goal is to follow the upward angle of the stairs. You can establish a baseline by running a piece of painter’s tape parallel to the angle of your handrail, a few feet above it. Use this line as your visual guide.
Start by placing your largest frame somewhere in the middle of the wall. Then, build outwards from there, adding smaller frames above, below, and to the sides. The key to making an organic gallery look cohesive is to maintain consistent spacing between the frames, even if the frames themselves are different. It tricks the eye into seeing a unified collection instead of just a jumble of pictures.
Don’t be afraid to mix horizontal and vertical frames. This adds visual interest and helps you fill in awkward gaps. The staircase gallery is supposed to look like it grew over time, so perfection isn’t the goal—personality is.
Project 3: The Eclectic Corner Cluster

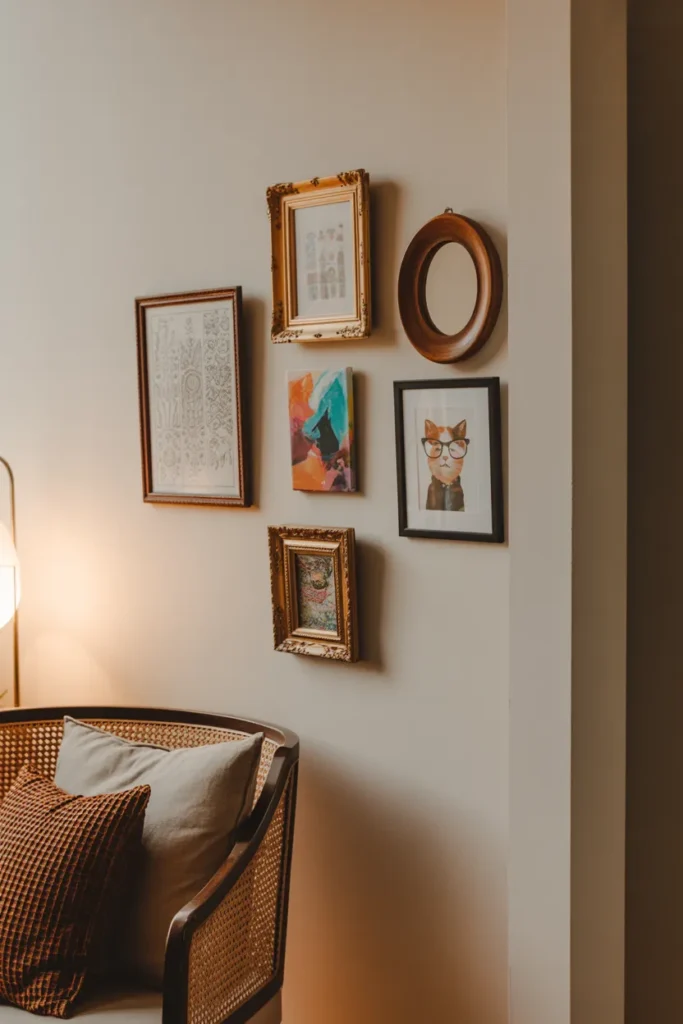
Who says gallery walls have to be on a big, open wall? A small corner can be the perfect spot for an eclectic cluster of art. This is a fantastic project for using up smaller pieces you love but don’t know where to put. It adds a pop of personality to an often-neglected space.
What You’ll Need
- Small to medium-sized frames in various shapes (square, round, oval) and styles.
- An assortment of art: think quirky illustrations, postcards, small abstract paintings, or even interesting fabric swatches.
How to Do It
This project is all about embracing asymmetry and having fun. Start with a central piece, maybe the one you love the most, and place it at eye level in the corner. Then, build your cluster around it, radiating outwards.
The trick here is to balance visual weight. If you have a dark or visually “heavy” piece on one side, balance it with a few smaller, lighter pieces on the other. Vary the orientation of the frames to create a dynamic, energetic feel.
Because this is a smaller collection, you can get away with more playful and unusual art. This is your chance to show off your unique style. It’s a low-risk, high-reward project that can totally transform a boring corner into a point of interest.
The Finishing Touch
You’ve planned, you’ve hammered, and your gallery wall is up. What now? A gallery wall is never truly “done.” It’s a living part of your home. Feel free to swap out photos and art as your tastes change or as you collect new pieces. That’s the beauty of it.
Creating a gallery wall is one of the most satisfying DIY projects you can do. It’s a powerful way to inject your personality into your home and tell your story without saying a word. So go ahead, grab that hammer, and turn that blank wall into your personal art gallery. You’ve got this.
