How to Create a Stylish Gallery Wall Step by Step Guide
So, you’ve got a blank wall that’s staring at you, practically begging for some personality. You’ve scrolled through Pinterest for hours, your eyes are probably blurry, and you’re convinced that only professional interior designers can pull off that effortlessly chic gallery wall look. I’ve been there. My first attempt looked less like a curated collection and more like my art had a fight and I just threw it on the wall to break it up. It was… a choice.
But here’s the good news: creating a stylish gallery wall is totally achievable, and you don’t need a degree in design to do it. It’s all about a little planning, a dash of creativity, and a willingness to maybe put a few extra holes in your wall. (Don’t worry, we’ll try to minimize that.) This guide is your new best friend. We’re going to walk through every single step, from picking your art to hanging the last frame, so you can create a gallery wall that looks amazing and feels completely you.
Step 1: Find Your Vibe & Choose Your Art

Before you even think about touching a hammer, you need a plan. What’s the mood you’re going for? A gallery wall is a reflection of your personality, so this is where the fun begins. Are you a minimalist who loves clean lines and monochrome palettes? Or are you a maximalist at heart, ready to embrace a riot of color and pattern?
Deciding on a theme or a vibe is the single most important step. It’s the glue that will hold your entire collection together, even if the individual pieces are very different. IMO, a gallery wall without a theme just looks like a random collection of stuff.
Curating Your Collection
Once you have a general direction, it’s time to gather your pieces. This is a treasure hunt! Look for art and objects that speak to you and fit your theme.
Here are a few ideas to get you started:
- Family Photos: Go for a mix of candid shots and professional portraits. You can choose all black-and-white photos for a classic, cohesive look, or mix color and monochrome for a more eclectic feel.
- Travel Memories: Frame postcards, maps of places you’ve visited, ticket stubs, and your favorite travel photos. It’s like a visual diary on your wall.
- Art Prints: This is where you can really let your personality shine. Look for prints from your favorite artists on sites like Etsy, Society6, or local art fairs. Don’t be afraid to mix different styles, like abstract paintings with line drawings.
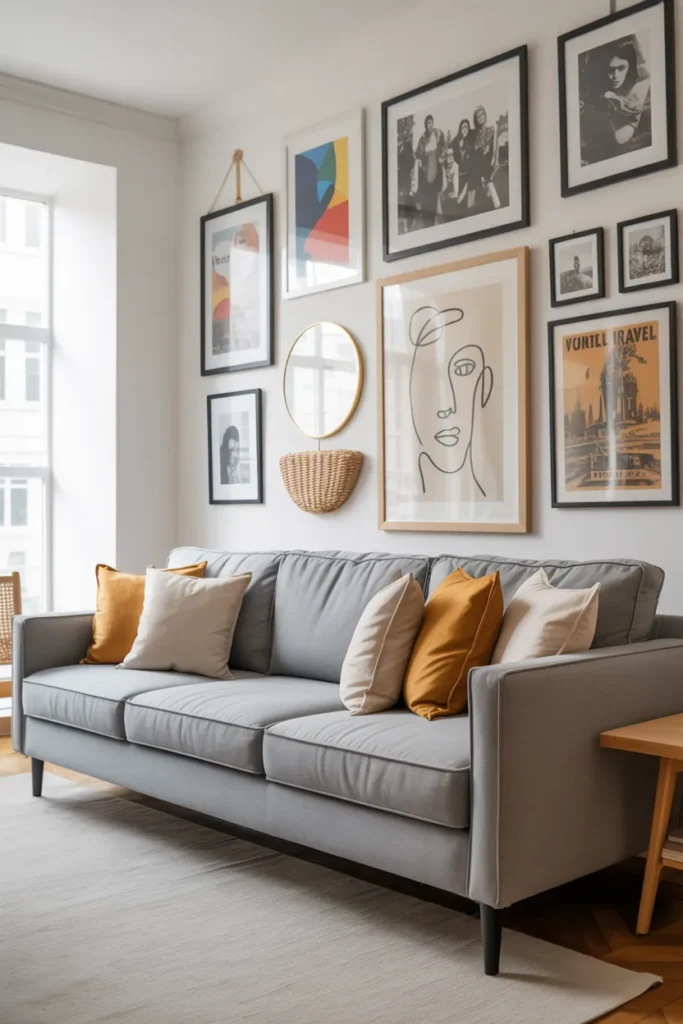
- Objects & Textures: Who said a gallery wall has to be all flat frames? Adding three-dimensional objects is a game-changer. Think small woven tapestries, mirrors, decorative plates, shallow baskets, or even your kid’s most impressive macaroni art. These pieces add depth and make your wall way more interesting.
My personal gallery wall is a chaotic mix of travel photos, a framed matchbook from a favorite restaurant, a small antique mirror, and a few abstract prints. It sounds weird, but because they all share a warm, earthy color palette, it just works. Don’t overthink it; if you love it, it belongs on your wall.
Step 2: Frames, Mats, and Materials

Alright, you’ve gathered your masterpieces. Now, how are you going to display them? The frames and mats you choose are just as important as the art itself. They can tie everything together or… make it look like a garage sale. No pressure, right?
To Match or Not to Match?
This is the eternal question. Should all your frames be identical? Or should you mix them up? Honestly, there’s no right answer it all depends on the look you’re aiming for.
- Matching Frames: Using all the same color and style of frame (e.g., all thin black frames or all chunky wood frames) creates a formal, structured, and cohesive look. This is a great choice for grid layouts or minimalist themes. It’s clean, it’s simple, and it’s pretty hard to mess up.
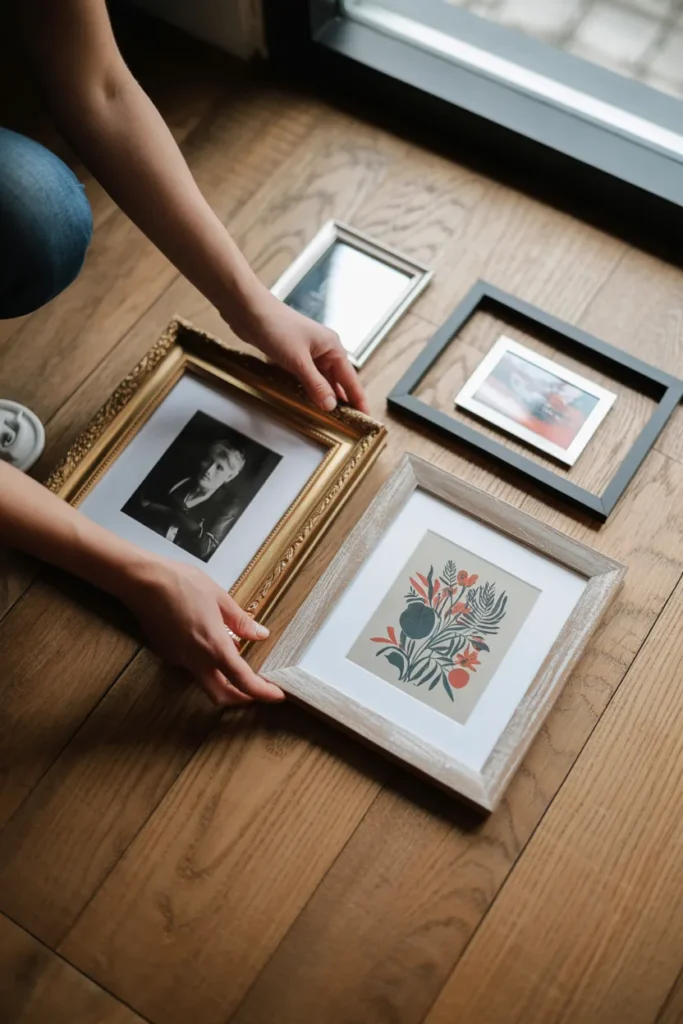
- Mixed Frames: Using a variety of frames in different colors, materials, and styles creates a more eclectic, collected-over-time feel. This is my personal favorite because it adds so much character. The trick to making it work is to have a common thread. For example, you could stick to a color palette (like black, white, and gold) or a material family (like different tones of wood).
The Magic of Matting
Do not, I repeat, do not underestimate the power of a mat. A mat is the paper-like border inside the frame. It gives your art breathing room and makes everything look more professional and expensive. Seriously, a cheap print can look like a gallery piece with the right mat.
When you’re mixing different sizes and types of art, using mats can help create visual consistency. For example, you can put a small 4×6 photo in a large 11×14 frame with a wide mat. This gives the small piece more presence and helps it hold its own next to larger artworks. It’s a fantastic trick for balancing your layout.
Step 3: Plan Your Layout (The Paper Method)

This is the step that separates the gallery wall pros from the amateurs. You might be tempted to just start hammering nails into the wall, but please, for the sake of your sanity and your security deposit, don’t. Planning your layout beforehand is the most critical step to avoid a lopsided, awkward-looking mess.
My favorite method? Using paper templates.
How to Use Paper Templates
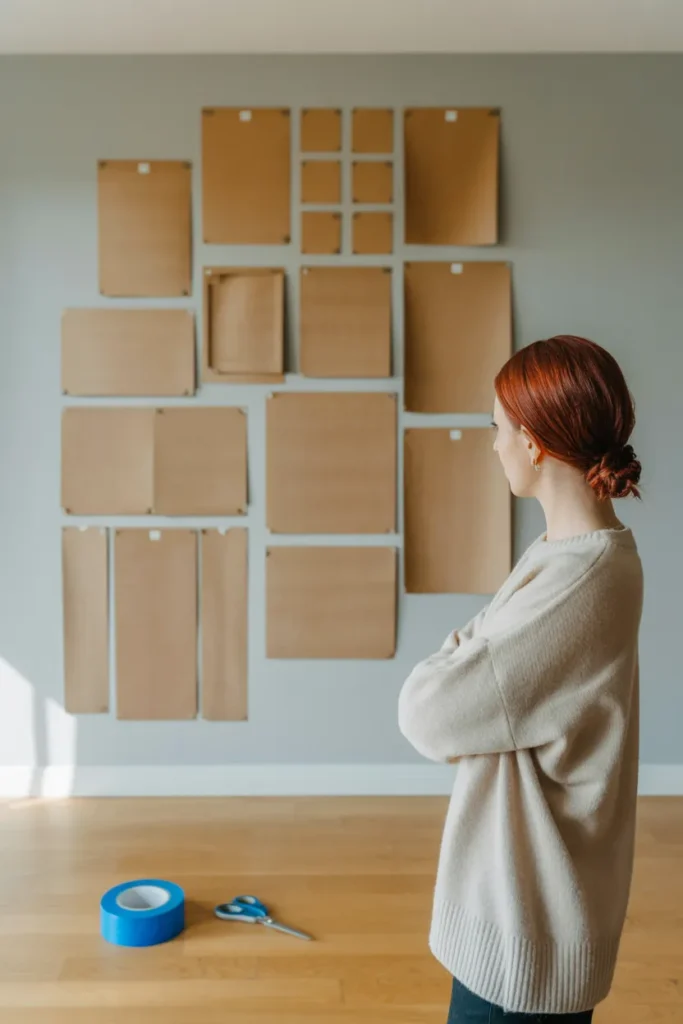
- Trace Your Frames: Get some craft paper, newspaper, or wrapping paper. Place each of your frames face-down on the paper and trace around it.
- Cut Them Out: Cut out each paper shape. Now you have a lightweight template for every piece in your collection.
- Mark the Hanger: This is a pro-tip! On each paper template, measure and mark the exact spot where the nail or hook needs to go. This will save you so much guesswork later.
- Arrange on the Wall: Using painter’s tape (it won’t damage your paint!), start arranging the paper templates on your wall. This is your playground. Move them around, swap them out, and step back frequently to see how it looks from a distance.
This process lets you visualize the final result without making a single hole. You can try out different arrangements until you find one that feels balanced and looks amazing. Live with it for a day or two. Does it feel right? Is it centered? Is it too high or too low? Make your adjustments now, while it’s easy.
Popular Layout Styles
Not sure where to start with your arrangement? Here are a few classic layouts:
- The Grid: This is a very organized, symmetrical layout where all frames are the same size and spaced evenly. It’s perfect for a formal or modern look. Think of Andy Warhol’s pop art prints.
- The Organic Cluster: This is a more free-form, asymmetrical arrangement. It starts with a central, large “anchor” piece, and then you build out from there with smaller frames. The key is to maintain a relatively consistent spacing (about 2-3 inches) between each frame to keep it from looking cluttered. This is great for an eclectic vibe.
- The Shelf Ledge: Want to avoid nails altogether? A picture ledge (or a series of ledges) is a fantastic solution. You can easily lean your frames on the shelf and swap them out whenever you feel like it. This gives you ultimate flexibility and a layered, casual look.
Step 4: The Moment of Truth – Hanging Your Wall
You’ve planned, you’ve prepped, and your paper templates are perfectly placed on the wall. Now it’s time to make it permanent. Deep breaths. You’ve got this.
Because you cleverly marked the hanger spot on each paper template, this part is surprisingly easy. You’re not guessing where the nail should go; you’re just hammering it right through the mark on the paper.
The Hanging Process
- Start with Your Anchor Piece: If you’re doing an organic cluster, hang your largest or most central piece first. This will ground the entire arrangement. If you’re doing a grid, it doesn’t matter as much, but starting in the center can help.
- Hammer and Hang: Grab your hammer and nails (or picture hooks, which are often better for drywall). Hammer the nail directly through the marked spot on your paper template.
- Tear and Reveal: Once the nail is in, gently tear the paper template off the wall. The nail will be left in the perfect position. Magic, right?
- Hang Your Frame: Place your frame on the nail. Use a level to make sure it’s perfectly straight. A crooked frame is the enemy of a stylish gallery wall. A small bubble level is your best friend here.
- Repeat: Continue this process for all your pieces, moving from the center outwards. Step back often to make sure everything is looking as planned.
Essential Tools for the Job
Having the right tools makes all the difference. You don’t need a full workshop, but a few basics will make your life a lot easier.
- Hammer: Obviously.
- Picture Hooks/Nails: A variety pack is great to have on hand.
- A Level: I can’t stress this enough. A small torpedo level is perfect. You can also use a level app on your phone in a pinch.
- Measuring Tape: For ensuring consistent spacing.
- Painter’s Tape: For the template method.
- Pencil: For marking.
FYI, if you’re a renter and terrified of making holes, consider using adhesive strips like Command Strips. They work great for lighter frames, but make sure you check the weight limit on the package. I learned that lesson the hard way when a framed print crashed to the floor in the middle of the night. It was… startling.
Conclusion
You did it! Your blank wall is now a stunning, personalized masterpiece. Step back, pour yourself a drink, and admire your hard work. This is a space that is uniquely yours, filled with memories, art, and objects that you love.
A great gallery wall is a living thing. Don’t be afraid to add to it, swap pieces out, or rearrange it as you find new treasures. It can evolve with you, telling the story of your life, one frame at a time. Now, go on and enjoy your incredibly stylish new space. You’ve earned it.

